In this post I'll show my experiences on writing my first unit tests for Flex code using FlexUnit.
There's already several excellent articles explaining how to start with FlexUnit. For example "Unit Testing with FlexUnit" and "How to use FlexUnit in Flex" provide a very nice introduction.
Creating a test cases
As in testing frameworks for other languages, test cases are defined as classes that inherit from a TestCase class. Individual tests are represented by methods.
The following example shows a method that tests a
Polynomial class.
package tests
{
  import flexunit.framework.TestCase;
  import flexunit.framework.TestSuite;
  import langexplr.Polynomial;

  public class PolynomialTests extends TestCase
  {
    /***** Utility methods ********/
    public static function suite():TestSuite
    {
      var theSuite:TestSuite = new TestSuite();
      theSuite.addTestSuite( PolynomialTests );
      return theSuite;
    }

    /***** Tests ********/
    public function testAdditionDiffExponents():void
    {
      var p2:Polynomial = new Polynomial([4,3,9]);
      var p1:Polynomial = new Polynomial([3.0]);


      var p3:Polynomial = p1.add(p2);

      assertEquals("Exponent",3,p3.coefficientValues.length);
      assertEquals("x^0",7.0,p3.coefficientValues[0]);
      assertEquals("x^1",3.0,p3.coefficientValues[1] );
      assertEquals("x^2",9.0,p3.coefficientValues[2] );
    }
    ...
  }
The
suite method is just an utility method that creates a TestSuite for all the tests in current test case. By calling theSuite.addTestSuite( PolynomialTests ); all the methods in the PolynomialTests class containing the word "test" will be included in the test suite.The
testAdditionDiffExponents method shows a simple test for the add method of the Polynomial class. As with other unit test frameworks, assertions are made inside the test method to verify the behavior of the code.Creating a test runner
The test runner provides a nice UI for displaying test results. The following code shows the creation of the runner.
<mx:Application xmlns:mx="http://www.adobe.com/2006/mxml" xmlns="*"
                   xmlns:flexunit="flexunit.flexui.*"
                    creationComplete="onCreationComplete()">

     <mx:Script>
         <![CDATA[
             import flexunit.framework.TestSuite;
             import tests.PolynomialTests;
             import tests.ConverterTests;
             import tests.NevilleCalculatorTests;

             private function onCreationComplete():void
             {
                  testRunner.test = createSuite();
                  testRunner.startTest();
              }

             private function createSuite():TestSuite {
                  var ts:TestSuite = new TestSuite();

                  ts.addTest( PolynomialTests.suite() );
                  ts.addTest( ConverterTests.suite() );
                  ts.addTest( NevilleCalculatorTests.suite() );

                  return ts;
              }

         ]]>
     </mx:Script>

     <flexunit:TestRunnerBase id="testRunner" width="100%" height="100%" />
 </mx:Application>
The
createSuite method creates all the test suites that will be executed. Running a tests
By loading a page that references the generated
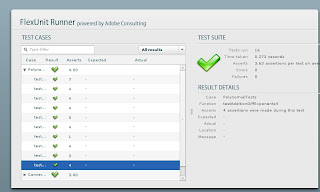
SWF file we can execute the tests and browse the results.The following screenshot shows a successful execution of the tests:

If a test fails message of the failed assertion is presented.

Creating a new kind of assertion
An assertion that compares two floating point numbers given a minimum difference is very useful while creating tests for the
Polynomial operations. The following class was created to be the base class for test cases that require this kind of assertions.
package tests
{
  import flexunit.framework.TestCase;
  import flexunit.framework.TestSuite;
  import flexunit.framework.AssertionFailedError;

  public class NumericTestCase extends TestCase
  {
    public static function assertNumberEquals(message:String,num1:Number,num2:Number,d:Number=0.00001):void
    {
      oneAssertionHasBeenMade();
      if (Math.abs(num1 - num2) > d)  {
        throw new AssertionFailedError(message+" "+ "expected:<" + num1 + "> but was:<" + num2 + ">");
      }
    }
  }
}
An example of a use of this assertion is the following:
assertNumberEquals("First evaluation",c.convertToPlaneY(40.0),p.evaluate(c.convertToPlaneX(30.0)));
By using the default value of the
d we're not required to always specify the tolerance value.