Wednesday, December 15, 2010

IronPython & Silverlight Part III: Basic Data Binding

One of the nicest features of Silverlight is data binding. This feature allows you to perform and receive changes on the UI without explicitly adding or removing elements from UI controls. For example:

<TextBox Text="{Binding TextToDisplay}">


This XAML code says that the value of the Text property is bound to the TextToDisplay property of the of the object specified by the DataContext property.

As with other Silverlight features data binding requires you to use a .NET object with properties. We can use clrtype to take advantage of this feature with IronPython.

For example, say that we want to bind a text property to a Python object to a TextBox:

<UserControl x:Class="System.Windows.Controls.UserControl"
xmlns="http://schemas.microsoft.com/client/2007"
xmlns:x="http://schemas.microsoft.com/winfx/2006/xaml">
<StackPanel Width="300" x:Name="layout_root" Background="White">
<TextBox x:Name="my_text_box"
Text="{Binding text_to_display, Mode=TwoWay}" />
<Button x:Name="my_button" Content="Show text"/>
</StackPanel>
</UserControl>


The app.py file looks like this:


from System.Windows import Application
from System.Windows.Controls import UserControl
import System
import clrtype
from System.Windows import MessageBox

class MyData:
__metaclass__ = clrtype.ClrClass

def __init__(self):
self.text = 'Initial text'

@property
@clrtype.accepts()
@clrtype.returns(System.String)
def text_to_display(self): return self.text


@text_to_display.setter
@clrtype.accepts(System.String)
@clrtype.returns()
def text_to_display(self, value):
self.text = value

class App:

def handle_click(self, sender, event_args):
MessageBox.Show(self.data.text)

def __init__(self):
self.data = MyData()
self.root = Application.Current.LoadRootVisual(UserControl(), "app.xaml")
self.root.my_text_box.DataContext = self.data
self.root.my_button.Click += lambda s,ea: self.handle_click(s,ea)

theApp = App()


Here the definition of MyData is decorated with the information on how to generate the .NET class elements to be exposed .


Since the binding is declarated as TwoWay modifications to the TextBox are reflected in the data instance.


As with Part I and Part II of these series, IronPython 2.7 beta 1 is used for all examples.

Tuesday, December 7, 2010

IronPython & Silverlight Part II: Basic event handling

There are a couple of ways to add event handlers to Silverlight controls. The common way is to add the event handlers directly in XAML. For example:

<Button x:Name="ButtonGo" Content="Go!" Click="MyClickHandler" />


Given that there's a definition for the MyClickHandler method in your C# code. However for IronPython there's a couple of options:

Directly in Python code


Event handlers can be added as in C# by using the '+=' operator. For example say that you have the following XAML code describing an UserControl:

<UserControl x:Class="System.Windows.Controls.UserControl"
xmlns="http://schemas.microsoft.com/client/2007"
xmlns:x="http://schemas.microsoft.com/winfx/2006/xaml">

<StackPanel Width="300" x:Name="layout_root" Background="White">
<TextBlock x:Name="Message" FontSize="30" />
<Button x:Name="ButtonGo" Content="Go!" />
</StackPanel>
<UserControl.Resources>
<Storyboard x:Name="MyStoryboard">
<DoubleAnimation
Storyboard.TargetName="Message"
Storyboard.TargetProperty="Opacity"
From="1.0" To="0.0" Duration="0:0:3"
AutoReverse="True"
RepeatBehavior="Forever"/>
</Storyboard>
</UserControl.Resources>
</UserControl>


Say we want to start the 'MyStoryboard' animation in the event handler for the Click event of the ButtonGo button. We can write:

from System.Windows import Application
from System.Windows.Controls import UserControl

def handle_click(sender, event_args):
theApp.root.MyStoryboard.Begin()

class App:

def __init__(self):
self.root = Application.Current.LoadRootVisual(MyUserControl(), "app.xaml")
self.root.Message.Text = "Welcome to Python and Silverlight!"
self.root.ButtonGo.Click += handle_click

theApp = App()


Using clrtype


The clrtype module can be used to define .NET classes from (Iron)Python classes . This module can be found in the IronPython samples package or here in the GitHub repository. The GUI Automated Testing blog has some nice tutorials on using clrtype.

To use this module, you have to copy the clrtype.py file to your app/ folder.

We can change the code this way:

from System.Windows import Application
from System.Windows.Controls import UserControl
from System.Windows import MessageBox
import System
import clrtype

class MyUserControl(UserControl):
__metaclass__ = clrtype.ClrClass

_clrnamespace = "MyNs"

@clrtype.accepts(System.Object, System.EventArgs)
@clrtype.returns(System.Void)
def my_click_handler(self, sender, event_args):
theApp.root.MyStoryboard.Begin()


def __getattr__(self, name):
return self.FindName(name)

def handle_click(sender,event_args):
theApp.root.MyStoryboard.Begin()

class App:

def __init__(self):
self.root = Application.Current.LoadRootVisual(MyUserControl(), "app.xaml")
self.root.Message.Text = "Welcome to Python and Silverlight!"

theApp = App()


With these definitions we can change the XAML code for the Button to have be:

<Button x:Name="ButtonGo" Content="Go!" Click="my_click_handler"/>


Notice that the definition of MyUserControl has a definition for __getattr__. This definition is used to still be able to access the definitions of child controls for example theApp.root.MyStoryboard.

Final words


Another way to do event handling is to use Commanding. This approach is preferred for MVVM. For future posts I'll try to cover the use of Commanding with IronPython.

Tuesday, November 30, 2010

Using IronPython with Silverlight, Part I

This is the first of series of posts on the topic of using IronPython to create Silverlight programs. Experimenting with these technologies is nice because you only need a text editor and the IronPython distribution.

Getting started


In these series of posts I'll be using IronPython 2.7 (which is in beta right now) and Silverlight 4 .

Once these packages are installed the first step is to copy a basic program template to a your work directory. The template is located in (IronPython path)\Silverlight\script\templates\python.

This template contains the following structure:


C:.
¦ index.html
¦
+---app
¦ app.py
¦ app.xaml
¦
+---css
¦ screen.css
¦
+---js
error.js


The app.py and app.xaml files contain the code for the entry point of the demo Silverlight application. The index.html file contains the Silverlight control host.

The default app.xaml code looks like this:

<UserControl x:Class="System.Windows.Controls.UserControl"
xmlns="http://schemas.microsoft.com/client/2007"
xmlns:x="http://schemas.microsoft.com/winfx/2006/xaml">

<Grid x:Name="layout_root" Background="White">
<TextBlock x:Name="Message" FontSize="30" />
</Grid>

</UserControl>


The default app.py code looks like this:

from System.Windows import Application
from System.Windows.Controls import UserControl

class App:
def __init__(self):
root = Application.Current.LoadRootVisual(UserControl(), "app.xaml")
root.Message.Text = "Welcome to Python and Silverlight!"

App()


As you can see this code loads the XAML file for defining the 'root visual' . The 'root.Message.Text = ...' assignment changes the text displayed by the 'Message' TextBlock instance. Notice that it uses the name of the control as if it were a member of the UserControl instance returned by LoadRootVisual. This is accomplished by using a DLR feature defined in the FrameworkElementExtension class (see ExtensionTypes.cs )

You can easily run this example by going to the command line and running Chiron:

C:\development\blog\ipy\basictest>c:\development\IronPython-2.7\Silverlight\bin\Chiron.exe /b
Chiron - Silverlight Dynamic Language Development Utility. Version 1.0.0.0
Chiron serving 'C:\development\blog\ipy\basictest' as http://localhost:2060/
21:03:45 200 1,185 /
21:03:45 200 792 /style.css!
21:03:45 200 2,492 /sl.png!
21:03:45 200 642 /slx.png!
21:03:49 404 580 /favicon.ico [Resource not found]


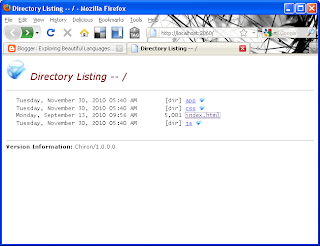
Running Chiron this way will start the web server and will open a web browser in its root.


(Note: For IronPython 2.7 Beta you have to copy the System.Numerics.dll assembly in the %IPY_HOME\Silverlight\bin folder, this file could be found in the Silverlight SDK distribution).

When you select the index.html file the Silverlight program is executed.


As you can see an IronPython REPL console is activated by default in this template. This console is activated by using the following tag in the HTML file.

<param name="initParams" value="reportErrors=errorLocation, console=true" />


The nice thing about this is that you can manipulate the Silverlight application while is executing. To see an example of this, we can change the definition of the App class to be like this:

class App:

def __init__(self):
self.root = Application.Current.LoadRootVisual(UserControl(), "app.xaml")
self.root.Message.Text = "Welcome to Python and Silverlight!"

theApp = App()


With this change we can now have access to the UI elements defined in XAML. For example:


For future posts I'm going to talk about specific topics on the use of Silverlight and IronPython.

A nice source of information on this topic is the following page by Michael Foord "Python in your Browser with Silverlight"

Monday, October 25, 2010

Writing Python's groupby in C#

A couple of days ago, while working on a C# program, I had the necessity of grouping contiguous elements from a sequence given a property. A group needs to be created each time the value of the property changes in a similar way to the uniq Unix utility.

Python has a function called groupby which is part of the nice itertools module which does exactly what I want. For example:


>>> strList = ["abc","ert","bre","sd","ghj","awe","ew","gh"]
>>> [list(g) for i,g in groupby(strList,lambda x: len(x))]
[['abc', 'ert', 'bre'], ['sd'], ['ghj', 'awe'], ['ew', 'gh']]
>>> numList = [1,2,2,2,1,1,1,5,5]
>>> [list(g) for i,g in groupby(numList)]
[[1], [2, 2, 2], [1, 1, 1], [5, 5]]


In .NET a class called Enumerable with lots of extension methods to manipulate with sequences (IEnumerable<T>). This class includes an extension method called GroupBy which groups values according to a key. However it behaves more like SQL's Group by in that it considers all the values of the collection. For example:

csharp> using System.Collections.Generic;
csharp> var strList = new List<string>() {"abc","ert","bre","sd","ghj","awe","ew","gh"};

csharp> strList.GroupBy(x => x.Length);
{ { "abc", "ert", "bre", "ghj", "awe" }, { "sd", "ew", "gh" } }

csharp> var numList = new List<int>() {1,2,2,2,1,1,1,5,5};

csharp> numList.GroupBy(x => x);
{ { 1, 1, 1, 1 }, { 2, 2, 2 }, { 5, 5 } }


(The C# examples will be presented using the very useful Mono C# REPL)

Writing the equivalent function in C# turned out to be a nice programming excessive. Also trying to write the function using only "yield return" turned out the more challenging than I thought!.

As a first try we can write this function using intermediate collections to store the partial groups:

using System.Collections.Generic;
using System;
namespace Langexplr.Experiments
{
public class MyTuple<T,K>
{
public T Item1 { get; set; }
public K Item2 { get; set; }


public static MyTuple<T1,K1> Create<T1,K1>(T1 first, K1 second)
{
return new MyTuple<T1,K1>() {Item1 = first, Item2 = second};
}
}
public static class GroupByTests
{
public static IEnumerable<MyTuple<K,IList<T>>> MyGroupByWithLists<T,K>(this IEnumerable<T> en,Func<T,K> keyExtraction)
{
K currentKey = default(K);
bool firstTime = true;
IList<T> currentGroup = new List<T>();
foreach(var aValue in en)
{
if (firstTime)
{
currentKey = keyExtraction(aValue);
firstTime = false;
}
else
{
K tmpKey = keyExtraction(aValue);
if (!tmpKey.Equals(currentKey))
{
yield return MyTuple<K,IList<T>>.Create(currentKey, currentGroup);
currentGroup = new List<T>();
currentKey = tmpKey;
}

}
currentGroup.Add(aValue);
}
if (currentGroup.Count > 0)
{
yield return MyTuple<K,IList<T>>.Create(currentKey, currentGroup);
}
}

}
}

Here I'm defining a class called MyTuple which is very similar to .NET 4' Tuple class to store group's key and members.

This function works as expected, for example:

csharp> strList.MyGroupByWithLists(x => x.Length).Select(x => x.Item2).ToList();
{ { "abc", "ert", "bre" }, { "sd" }, { "ghj", "awe" }, { "ew", "gh" } }
csharp> numList.MyGroupByWithLists(x => x).Select(x => x.Item2).ToList();
{ { 1 }, { 2, 2, 2 }, { 1, 1, 1 }, { 5, 5 } }


One of the interesting things about the Python version of groupby is that it doesn't create an intermediate collections for each group. The itertools module reference has the code for the groupby implementation.

Trying to write a this function with similar characteristics in C# resulted in the following (scary) code:


public static IEnumerable<MyTuple<K,IEnumerable<T>>> MyGroupBy<T,K>(this IEnumerable<T> en,Func<T,K> keyExtraction)
{
K currentGroupKey = default(K);
bool firstTime = true;
bool hasMoreElements = false;
bool yieldNewValue = false;

IEnumerator<T> enumerator = en.GetEnumerator();
hasMoreElements = enumerator.MoveNext();
while (hasMoreElements)
{
if (firstTime)
{
firstTime = false;
yieldNewValue = true;
currentGroupKey = keyExtraction(enumerator.Current);
}
else
{
K lastKey;
while((lastKey = keyExtraction(enumerator.Current)).Equals( currentGroupKey) &&
(hasMoreElements = enumerator.MoveNext()))
{

}
if(hasMoreElements &&
!lastKey.Equals(currentGroupKey))
{
currentGroupKey = lastKey;
yieldNewValue = true;
}
else
{
yieldNewValue = false;
}
}

if (yieldNewValue) {
yield return MyTuple<K,IEnumerable<T>>.Create(
currentGroupKey,
ReturnSubSequence((x) => {
hasMoreElements = enumerator.MoveNext();
return hasMoreElements &&
x.Equals(keyExtraction(enumerator.Current)); },
enumerator,
currentGroupKey,
enumerator.Current));
}
}
}
static IEnumerable<T> ReturnSubSequence<T,K>(Predicate<K> pred, IEnumerator<T> seq,K currentElement,T first)
{
yield return first;
while( pred(currentElement))
{
yield return seq.Current;
}
}


Using this function we can write:


csharp> numList.MyGroupBy().Select(x => x.Item1);
{ 1, 2, 1, 5 }
csharp> numList.MyGroupBy().Select(x => x.Item2.ToList());
{ { 1 }, { 2, 2, 2 }, { 1, 1, 1 }, { 5, 5 } }
csharp> strList.MyGroupBy(s => s.Length).Select(x => x.Item1);
{ 3, 2, 3, 2 }
csharp> strList.MyGroupBy(s => s.Length).Select(x => x.Item2.ToList());
{ { "abc", "ert", "bre" }, { "sd" }, { "ghj", "awe" }, { "ew", "gh" } }


One interesting fact about this way of writing the groupby function is that, you have to be very careful handling the resulting iterator/enumerable. From Python's groupby documentation:

The returned group is itself an iterator that shares the underlying iterable with groupby(). Because the source is shared, when the groupby() object is advanced, the previous group is no longer visible


For example in Python, the following effect occurs if we consume the complete iterator before consuming each group:

>>> l = groupby(strList,lambda s: len(s))
>>> consumed = list(groupby(strList,lambda s: len(s)))
>>> [list(g) for k,g in consumed]
[[], ['gh'], [], []]


In our C# version we have a similar restriction, for example:


csharp> var consumed = strList.MyGroupBy(s => s.Length).ToList();
csharp> consumed.Select(x => x.Item2);
{ { "abc" }, { "sd" }, { "ghj" }, { "ew" } }


Code for this post can be found here.

Wednesday, October 13, 2010

Using C#'s implicit type conversions from other .NET languages

One interesting C# feature is the ability to define a method that implements implicit conversion from one type to another. In this post I'm going to show how to use this feature from IronPython, F#, VB.NET and IronRuby.

Example


In order to illustrate the implicit conversion feature we're going to use the following classes:


namespace Langexplr.Experiments
{
public class Complex
{
public double Real { get; set; }
public double Img { get; set; }

public static implicit operator Complex(double real)
{
return new Complex() { Real = real };
}

public static implicit operator Polar(Complex complex)
{
return new Polar() { Angle = Math.Atan(complex.Img/complex.Real),
Length = Math.Sqrt(complex.Real*complex.Real +
complex.Img*complex.Img) };
}

public static implicit operator double(Complex complex)
{
return Math.Sqrt(complex.Real*complex.Real +
complex.Img*complex.Img);
}

}

public class Polar
{
public double Angle { get; set; }
public double Length { get; set; }
}
}


The Complex class is a simple definition of a complex number. The Polar class is defined(conveniently) to represent a complex number in polar form. The Complex class defines three implicit conversions:

  1. From double to a complex number

  2. From Complex to Polar

  3. From Complex to double


The following C# code shows a use of this feature:


using Langexplr.Experiments;
using System;

class main
{
public static void Main(string[] args)
{
Complex c = 10.3;
Polar p = new Complex() {Real = 12.3, Img = 5.2};
double abs = c;

Console.WriteLine("abs:{0} Polar: {1},{2}", abs ,p.Angle ,p.Length);
}
}


By looking at the definitions generated by the compiler for the Complex class, we can see several definitions for the op_Implicit method with different parameters and return types.

...
.method public hidebysig specialname static
class Langexplr.Experiments.Complex
op_Implicit(float64 real) cil managed
...
.method public hidebysig specialname static
class Langexplr.Experiments.Polar
op_Implicit(class Langexplr.Experiments.Complex complex) cil managed
...
.method public hidebysig specialname static
float64 op_Implicit(class Langexplr.Experiments.Complex complex) cil managed
...


Now these uses of the Complex class will be presented on different .NET languages.

IronPython


As described in "Dark Corners of IronPython" by Michael Foord the clr.Convert function can be used to convert between types using the op_Implicit if necessary.

For example:


import clr
clr.AddReference("ImplicitTest")

from Langexplr.Experiments import *
from System import Double

c = clr.Convert(10.3, Complex)
nC = Complex()
nC.Real = 12.3
nC.Img = 5.2
p = clr.Convert(nC, Polar)
abs = clr.Convert(c, Double)

print 'abs: %(0)f Polar: %(1)f,%(2)f\n' % \
{ '0': abs, '1' : p.Angle, '2' : p.Length }


IronRuby


IronRuby will use the op_Implicit definition if a conversion required at a particular call. I couldn't find a nice way to do this directly as with IronPython's clr.Convert . However the following function definition seems to do the trick:


def dotnet_convert(value,type)
f = System::Func[type,type].new {|x| x}
f.invoke(value)
end


This conversion function works since IronRuby tries to convert the value to the expected .NET type in the call to 'invoke' .

Using this definition we can write:


require 'ImplicitTest.dll'

c = dotnet_convert(10.3,Langexplr::Experiments::Complex)
nC = Langexplr::Experiments::Complex.new
nC.Real = 12.3
nC.Img = 5.2
p = dotnet_convert(nC,Langexplr::Experiments::Polar)
abs = dotnet_convert(c,System::Double)

print "abs: #{abs} Polar: #{p.Angle},#{p.Length} \n"


F#


In F# we can call the op_Implicit method directly and F# will use type inference to determine the correct overload to use.

For example:

open Langexplr.Experiments

let c : Complex = Complex.op_Implicit 10.3
let p : Polar = Complex.op_Implicit (new Complex(Real=12.3, Img=5.2))
let abs : double = Complex.op_Implicit c

System.Console.WriteLine("1. {0} Polar: {1},{2} ", abs, p.Angle, p.Length )


There's a nice post called "F# – Duck Typing and Structural Typing" by Matthew Podwysocki, which describes a nice way to define a generic function to use the op_Implicit operator.


let inline convert (x:^a) : ^b = ((^a or ^b) : (static member op_Implicit : ^a -> ^b) x )


This function can be used as follows:


let c2:Complex = convert 10.3
let p2:Polar = convert (new Complex(Real=12.3, Img=5.2))
let abs2:float = convert c

System.Console.WriteLine("2. {0} Polar: {1},{2} ",abs2,p2.Angle,p2.Length)


VB.NET


Finally in Visual Basic .NET the implicit conversion is used automatically as in C#. For example:


Imports System
Imports Langexplr.Experiments
Module Test
Sub Main
Dim c As Complex = 10.3
Dim p As Polar = new Complex() With { _
.Real = 12.3, _
.Img = 5.2 _
}
Dim abs As Double = c
Console.WriteLine("abs:{0} Polar: {1},{2}",abs,p.Angle,p.Length)
End Sub
End Module

Monday, August 23, 2010

Extracting elements from Win32 resource files with F#

Recently I had the necessity of extracting cursors, bitmaps and icons stored in a Win32 compiled resource script file (.res) file. Although there are tools that could do that, this seems like a good excuse to use F# and code from
a previous post: "Using F# computation expressions to read binary files".

Resource file format


The format for the compiled resource file is documented in MSDN "Resource File Formats" . According with this document each entry of the resource file is prefixed by the following header (RESOURCEHEADER) :

  DWORD DataSize;
DWORD HeaderSize;
DWORD TYPE;
DWORD NAME;
DWORD DataVersion;
WORD MemoryFlags;
WORD LanguageId;
DWORD Version;
DWORD Characteristics;


The DataSize field indicates the size of the resource data following the header. According to "RESOURCEHEADER Structure" The TYPE and NAME fields could be stored in two different ways. It could be a zero terminated unicode string or a int16 identifier prefixed by a -1 int16 value. Also after the type/name and entries and after the data of each resource we need to read extra padding bytes that align the entry to DWORD.

Using the code defined for reading binary files the RESOURCEHEADER structure could be specified as:

type ResourceId =
| Numeric of int16
| Name of char[]

let pBuilder = new BinParserBuilder()

let resourceParser = pBuilder {
let! dataSize = RInt
let! headerSize = RInt
let! typePrefix = RShort
let! resourceType =
if typePrefix = -1s then
wrap(RShort, Numeric)
else
wrap(RZString,
(fun data -> Name(Array.concat
[[|char(typePrefix)|];
data] )))
let! namePrefix = RShort
let! resourceName =
if namePrefix = -1s then
wrap(RShort, Numeric)
else
wrap(RZString,
(fun data -> Name(Array.concat
[[|char(namePrefix)|];
data] )))
let typeAndNameLength = sizeOfResourceId resourceType +
sizeOfResourceId resourceName

let! _ = RDWordAlignData(typeAndNameLength)

let! dataVersion = RInt
let! memoryFlags = RShort
let! languageId = RShort
let! version = RInt
let! characteristics = RInt
let! contents = RByteBlock(dataSize)

let! _ = RDWordAlignData(dataSize)

return (resourceName,resourceType,contents)
}


Using this code we can extract each entry of the resource file by writing the following:

let file = new FileStream(fileName, FileMode.Open)
let binaryReader = new BinaryReader(file, System.Text.Encoding.Unicode)

let resources =
seq {
while(file.Position < file.Length) do
match (resourceParser.Function binaryReader) with
| Success (t,_) -> yield (Some t)
| Failure _ -> printf "Error!"
yield None
} |> List.ofSeq


Extracting Icons


Icons have two entries inside the resource files. The first entry has information about the image and the other contains the actual image data.

The following function writes all the icons in the resource list:

resources |>
filterMap (fun current ->
cursorIconInfo current 14s getIconInfo "ico") |>
filterMap (fun (originalid, (_, i, planes, bitcount, bytes, iconId)) ->
match (List.find (isEntryWithId iconId) resources) with
| Some(_, _, data) ->
Some(originalid, i, planes, bitcount, data)
| _ -> None) |>
Seq.iter (fun (name, (w, h, colorcount), planes, bitcount, contents) ->
writeIcon(name, (w, h, colorcount),
bitcount, planes, contents))


The information about the icon is extracted using cursorIconInfo which works for the cursor and the icon entry:


let cursorIconInfo resourceInfo resourceType infoExtractFunction extension =
match resourceInfo with
| Some(resName,Numeric(rType),data) when rType = resourceType ->
match resName,(infoExtractFunction data) with
| Numeric(id), Success(t,_) ->
Some(sprintf "%s%O.%s" extension id extension,t)
| Name(nameChars), Success(t,_) ->
Some(new String(nameChars) + "." + extension,t)
| _,_ ->
printf "WARNING: Skipping resource: %O\n" id
None
| _ -> None


With the data returned from this function we can get the id number of the resource file entry that contains the image data (iconCursorId). We can then get the resource entry of the icon and extract the image info from there using the following code:

let iconResEntry = pBuilder {
let! reserved = RShort
let! restype = RShort
let! rescount = RShort
let! iconWidth = RByte
let! iconHeight = RByte
let! colorCount = RByte
let! reserved = RByte
let! planes = RShort
let! bitCount = RShort
let! bytesInRes = RInt
let! iconCursorId = RShort
return (reserved, restype, rescount),
(iconWidth, iconHeight, colorCount),
planes, bitCount, bytesInRes, iconCursorId
}

let getIconInfo (data : byte array) =
use str = new MemoryStream(data)
use bReader = new BinaryReader(str)
iconResEntry.Function bReader


Image information stored in the payload section of the resource is almost the same as a .ICO file . So in order to extract the icon what we need to do is to generate part of the header of a valid ICO file. The following function does that:

let writeIcon(fileName,
(width : byte, height : byte, bitcount : byte),
bpp : int16,
planes : int16,
contents : byte array) =
use writer = new FileStream(fileName, FileMode.Create)
use bwriter = new BinaryWriter(writer)
bwriter.Write(0s)
bwriter.Write(1s)
bwriter.Write(1s)
bwriter.Write(byte(width))
bwriter.Write(byte(height))
bwriter.Write(byte(bitcount))
bwriter.Write(byte(0))
bwriter.Write(planes)
bwriter.Write(bpp)
bwriter.Write(contents.Length)
bwriter.Write(int32(writer.Position) + 4)
bwriter.Write(contents)


Extracting Cursors


The process of writing the cursors is almost the same as the process with icons. The following code filters the cursor resources and extract them:

resources |>
filterMap (fun current -> cursorIconInfo current 12s getCursorInfo "cur") |>
filterMap (fun (name, (_, (w, h), _, bitCount, _, cursorId)) ->
match List.find (isEntryWithId cursorId) resources with
| Some(_, _, theData) -> Some(name, bitCount, theData)
| _ -> None) |>
Seq.iter ( fun (name, bitcount, contents) ->
writeCursor(name, byte(bitcount),contents))


The getCursorInfo function extracts data from the cursor specific entry:

let cursorResEntry = pBuilder {
let! reserved = RShort
let! restype = RShort
let! rescount = RShort
let! cursorWidth = RShort
let! cursorHeight = RShort
let! planes = RShort
let! bitCount = RShort
let! bytesInRes = RInt
let! iconCursorId = RShort
return (reserved, restype, rescount),
(cursorWidth, cursorHeight),
planes, bitCount, bytesInRes, iconCursorId
}

let getCursorInfo (data : byte array) =
use str = new MemoryStream(data)
use bReader = new BinaryReader(str, System.Text.Encoding.Unicode)
cursorResEntry.Function bReader


As with the icon entry, the cursor entry has the data in almost the same format as a .CUR file so we need to generate a valid header for this file.

let writeCursor(fileName, bitcount : byte, contents : byte array) =
use writer = new FileStream(fileName, FileMode.Create)
use bwriter = new BinaryWriter(writer)
bwriter.Write(0s)
bwriter.Write(2s)
bwriter.Write(1s)
//Assume 32x32
bwriter.Write(byte(32))
bwriter.Write(bitcount)
bwriter.Write(byte(0))
let v1 = uint16(contents.[0]) ||| (uint16(contents.[1] <<< 16))
let v2 = uint16(contents.[2]) ||| (uint16(contents.[3] <<< 16))
bwriter.Write(v1)
bwriter.Write(v2)
bwriter.Write(contents.Length - 4)
bwriter.Write(int32(writer.Position) + 4)
bwriter.Write(contents,4,contents.Length - 4 )


As you can see from the code I had to assume that the resolution of the cursor is 32x32 . This is because the data didn't seem to have the correct information as specified in "CURSORDIR Structure" .


Extracting Bitmaps


Finally writing bitmap file entries is very easy. The bitmap data is stored using the DIB format which is part of the BMP file format. The following fragment shows how we extract these resources.

resources |> 
filterMap (fun res -> match res with
| Some(Numeric id, Numeric 2s, data) ->
Some(sprintf "bmp%O.bmp" id, data)
| Some(Name nameChars, Numeric 2s, data) ->
Some(new String(nameChars)+".bmp", data)
| _ -> None) |>
Seq.iter (fun (name, data) -> writeBmp(name, data))


As with the other elements, the writeBmp function writes the appropriate header according to the BMP file format.

let writeBmp(name,data:byte array) =
use writer = new FileStream(name,FileMode.Create)
use bwriter = new BinaryWriter(writer)
bwriter.Write(0x42uy)
bwriter.Write(0x4Duy)
bwriter.Write(14 + data.Length)
bwriter.Write(5s)
bwriter.Write(5s)
// According to the DIB header the image color depth
// is located ad offset 14
let paletteSize =
if data.[14] < 24uy then
int((2.0 ** float(data.[14])) * 4.0)
else
0
bwriter.Write(14 + 40 + paletteSize)
bwriter.Write(data)


Code for this post can be found here.
Saturday, June 19, 2010

Generating XML with Newspeak

While experimenting with Newspeak I wrote a small utility class for generating basic XML documents.

An example of its use looks like this:

w:: getTestingWriter: output .
w element: 'foo'
attributes: { {'id'. 'goo'.} }
with: [
w element: 'foo1'.
w element: 'foo2'.
w element: 'foo3'
with: [
w element: 'foo4'
with: [
w text: 'Hello'.
].
w cdata: ''.
].
].


This generates:

<foo id="goo"><foo1 /><foo2 /><foo3><foo4>Hello</foo4><![CDATA[<loo>]]></foo3></foo>


The code for generating XML this way is based on a previous experiment of using Python's 'with' statement to wrap the .NET's System.Xml.XmlWriter class to generate XML.

Code for this post can be found here.

Sunday, June 13, 2010

Parsing XML documents with namespaces in Newspeak

The previous post showed a basic grammar for XML written using Newspeak parsing combinators. Although Newspeak already includes XML support, it is a great exercise to explore another interesting parts of the language.

The grammar


The grammar defined in the previous post looks like this:

class XmlGrammar = ExecutableGrammar(
"Xml 1.0 grammar with namespaces according to http://www.w3.org/TR/REC-xml/ "
|
openAB = char: $<.
closeAB = char: $>.
amp = char: $&.
semicolon = char: $; .
slash = char: $/.


topenAB = tokenFromChar: $<.
tcloseAB = tokenFromChar: $>.
tslash = tokenFromChar: $/.

comment = openAB , (char: $-),(char: $-),
((charExceptFor: $-) | ((char: $-), (charExceptFor: $-))) plus,
(char: $-),(char: $-),closeAB .

letter = (charBetween: $a and: $z) | (charBetween: $A and: $Z).
digit = charBetween: $0 and: $9.

colon = char: $:.

quote = (char:$') .
dquote = (char:$") .

eq = tokenFromChar: $= .

VersionNum = (char:$1), (char: $.) , (charBetween: $0 and: $9) plus.

VersionInfo = (tokenFromSymbol: #version), eq, ((quote, VersionNum,quote) | (dquote, VersionNum, dquote )).

EncName = letter, (letter | digit) star.

EncodingDecl = (tokenFromSymbol: #enconding) , eq , ((quote, EncName ,quote) | (dquote , EncName , dquote )).

yesNo = (tokenFromSymbol: #yes) | (tokenFromSymbol: #no).

SDDecl = (tokenFromSymbol: #standalone), eq, ((quote, yesNo ,quote) | (dquote , yesNo , dquote )).

XMLDecl = (char: $<) , (char: $?) ,(tokenFromSymbol: #xml), VersionInfo , EncodingDecl opt, SDDecl opt,
(tokenFromChar: $?), (char: $>).

dprolog = XMLDecl.

NameStartChar = letter | (char: $_) .

NameChar = NameStartChar | (char: $-) | (char: $.) | digit.

Name = NameStartChar, NameChar star.

NameWithPrefix = Name, colon, Name.

QName = NameWithPrefix | Name.

TQName = tokenFor: QName.

EntityRef = amp, Name ,semicolon .

CharRef = amp, (char: $#), (((char:$x), (digit | letter) plus) | (digit plus)) ,semicolon .

Reference = EntityRef | CharRef.

AttributeContent1 = (charExceptForCharIn: {$< . $". $&. }) | Reference.


AttributeValue = (dquote, AttributeContent1 star,dquote) |
(quote, AttributeContent1 star,quote).

Attribute = TQName ,eq, AttributeValue.

EmptyElemTag = topenAB ,QName, Attribute star, tslash , closeAB .
STag = topenAB ,QName, Attribute star, tcloseAB .
ETag = topenAB ,slash,QName, tcloseAB .

CDStart = topenAB ,(char: $!),(char:$[),(tokenFromSymbol: #CDATA),(char:$[).
CDEnd = (char: $]),(char: $]),(char: $>).

CDSect = CDStart, (charExceptFor: $]) star , CDEnd.

CharData = tokenFor: ((charExceptForCharIn: {$&. $<}) plus).

content = CharData opt, ((element | Reference | CDSect), CharData opt) star.

ComplexElement = STag, content , ETag.

element = EmptyElemTag | ComplexElement .


|
)
(
...
)


XML nodes


The next step was to add support for the creation of data structures representing the XML document. A technique presented in the Executable Grammars[PDF] paper suggest creating a subclass of the grammar which adds the code for creating the XML node tree.

class XmlParserWithXmlNodes = XmlGrammar (
"Basic XmlParser with XML node AST"
|


|)
('as yet unclassified'
Attribute = (
^ super Attribute wrapper: [:name :eq :value | {name. value.}].
)

AttributeValue = (
|flattenString|
^ super AttributeValue
wrapper: [:q1 :chars :q2 |
flattenString:: (chars collect:
[:c | (c isString)
ifTrue: [c at: 1]
ifFalse: [c]]).
String withAll:flattenString ].
)

CDSect = (
^ super CDSect wrapper: [:cs :data :ce | String withAll: data].
)

CDStart= (
^ super CDStart wrapper: [:t :e :b1 :cdata :b2 | 'cdatastart'].
)

CharData = (
^ super CharData wrapper: [:chars | String withAll: (chars token ) ].

)

CharRef = (
|numberStr|
^ super CharRef
wrapper: [:a1 :p :numberChars :sc |
|base|
numberStr:: ((numberChars at: 1) = $x)
ifTrue: [base:: 16.
String withAll: (numberChars at: 2)]
ifFalse: [base:: 10.
String withAll: numberChars].

(Unicode value: (Number readFrom: numberStr base: base)) asString
].
)

ComplexElement = (
|tn attCollection|
tn:: XmlNodes new.
attCollection:: tn Attributes new.

^ super ComplexElement
wrapper: [:s :childNodes :e |
(e asString = s name asString)
ifFalse: [error: 'Open tag different from closing tag'].
s childNodes: childNodes.
s].
)

ETag = (
^ super ETag wrapper: [:o :s :name :c | name].
)

EmptyElemTag = (

^super EmptyElemTag
wrapper: [:oab :name :atts :s :cab |
|tn attCollection|
tn:: XmlNodes new.
attCollection:: tn Attributes new.

atts do: [:att | attCollection addAttributeWithQName: ((att at: 1) token) value: (att at:2)].
tn Element name: name attributes: attCollection childNodes:{} ].
)

EntityRef = (
^ super EntityRef
wrapper: [:a :name :sc |
(entities valueForName: ((name at: 1) at: 1)) asString ].
)

Name = (
^ super Name wrapper: [:startChar :rest | { { (startChar asString), (String withAll: rest) } } ].
)

NameWithPrefix = (
|tn|
tn:: XmlNodes new.
^ super NameWithPrefix
wrapper: [ :prefix :c :name |
{{(prefix at: 1). (name at: 1).}} ].
)

QName = (
|tn|
tn:: XmlNodes new.
^ super QName wrapper: [ :data | ((data size) = 2)
ifTrue:[tn QualifiedName prefix: ((data at:1) at: 1)
localPart:((data at: 2) at:1)]
ifFalse:[tn QualifiedName prefix: nil localPart: (data at: 1)]]
)

STag = (
^super STag
wrapper: [:oab :name :atts :cab |
|tn attCollection|
tn:: XmlNodes new.
attCollection:: tn Attributes new.
"Add attributes"
atts do: [:att | attCollection addAttributeWithQName: ((att at: 1) token)
value: (att at:2)].
"Create elements"
tn Element name: name attributes: attCollection childNodes:{} ].
)

VersionInfo = (
^super VersionInfo
wrapper: [:v :e :versionTextList | versionTextList at: 2].
)

VersionNum = (
^super VersionNum
wrapper: [:one :dot :num |
Number
readFrom: (String withAll: {one.dot},(String withAll: num))].
)

XMLDecl = (
|tn|
tn:: XmlNodes new.
^super XMLDecl
wrapper: [:c1 :c2 :x :versionInfo :enc :sd :c3 :c4 |
tn TAstXmlDecl version: versionInfo
encoding: enc
standalone: sd] .
)

content = (
|result|

^ super content wrapper: [:chars :cseq |
(chars = nil)
ifTrue: [result:: {}]
ifFalse: [result:: {chars}].
cseq inject: result into: [:total :current |
result:: addCompactingStrings: (current at: 1) to: result .
(current at: 2) ifNotNil: [:c | addCompactingStrings: c to: result ].
result ].
].
)

...

)


XML Namespaces


Support for XML namespace resolution was the next step. As described in the Namespaces in XML 1.0 document, XML can have different namespaces for its elements. For example:

<docs:letter docs:xmlns="http://www.foo.com/docs"
pic:xmlns="http://www.foo.com/docs/links">
<docs:paragraph>some text1</docs:paragraph>
<pic:pictureRef location="goo/moo/loo"/>
<docs:paragraph>some text2</docs:paragraph>
</docs:letter>


In this case the 'docs:xmlns' and 'pic:xmlns' attributes associates the 'docs' and 'pics' prefixes to the specified namespaces. So the namespace of the 'letter' element is 'http://www.foo.com/docs'.

Also default namespaces could be specified, like this:

<letter xmlns="http://www.foo.com/docs">

<paragraph>some text1</paragraph>
<pictureRef location="goo/moo/loo"
xmlns="http://www.foo.com/docs/links" />
<paragraph>some text2</paragraph>
</letter>


The basic idea is that xmlns attributes define an scope where a set of prefix/namepace associations and a default namespace are valid. For each start tag a new scope with new declarations must be in context and each end tag must remove the last scope.

Extending the parsing context


In order to do add this functionality, we need to be able to keep a stack with the scopes of namespace declarations that is modified each time we enter or exit from a element declaration. Fortunately, the parser combinator library includes a ParserContext class which is used for keeping track parsing errors.

One problem to use ParserContext was that an instance of it is created inside the CombinatorialParser parse: method which is part of the parsing library. This instance is configured in certain way to process parsing errors. So in order to create add a extended context we needed to somehow replace the ParserContext class with a new implementation.

Luckly, as described in the Modules as Objects in Newspeak[PDF] paper in Newspeak you can override inner class definitions just like you override methods in any other OO language. This means that I can extend the parser library and since ParserContext is defined as an inner class, override its definition to add my own parsing context. The definition of the extended parsing library looks like this:

class ParserLibraryWithXmlContext = parserLibraryClass usingLib: platform (
"A parser library with overwritten parsing context for Xml namespace resolution"
|
parserLibContext = super ParserContext .
|
)
(

class ParserContext = parserLibContext(
"An Xml parser context that keeps track of namespaces."
|
protected prefixes = collections MutableArrayList new: 10.
|
)
('as yet unclassified'
addPrefix: prefix for: namespace = (
|lastLevel|
lastLevel:: prefixes at: (prefixes size).
lastLevel at: prefix put: namespace.

)

namespaceFor: prefix = (
|levelIndex|

levelIndex:: prefixes findLast: [:lvl | (lvl includesKey: prefix) ].
^(levelIndex > 0)
ifTrue: [(prefixes at: levelIndex) at: prefix]
ifFalse: [nil].
)

popLevel = (
prefixes pop.
)

pushLevel = (
prefixes push: (collections MutableHashedMap new).
)


))


This is pretty nice since it allowed us to inject our own implementation of ParsingContext (which extends the original!). An interesting thing to notice is the definition of the parserLibContext which is bound to the base definition of the ParserContext class which we need in order to inherit from it.

Using the extended context


Now having added the new parsing context the next step is to add the code to manipulate the context. In order to do that, we need to add a some functionality to the STag, EmptyElement and ETag productions of the grammar so we can push and pop namespace scopes for each element. In other to do this without modifying the existing functionality three wrappers were created for each of this productions:


class ParserWithNamespaceForStartTag = CombinatorialParser (
"A parser that takes care of modyfing the parsing context for a start tag"
|
innerparser
|
)
('as yet unclassified'
forParser: p = (
innerparser:: p.
)

parse: input inContext: context ifError: blk = (
|result xmlnsAttributes elementName elementNamespace attName|
result:: innerparser parse: input inContext:context ifError:blk.
"First update the context with the newest prefix declarations"
context pushLevel.
xmlnsAttributes:: result attributes allAttributesWithLocalName: 'xmlns'.
xmlnsAttributes
do: [:aPair | context addPrefix: ((aPair at: 1) prefix)
for: (aPair at: 2)].
"Update the element"
elementName:: result name.
elementNamespace:: context namespaceFor: elementName prefix.
elementName namespace: elementNamespace.

"Update the attributes"
result attributes
do: [:aPair |
attName:: aPair at: 1.
attName namespace:
(context namespaceFor: attName prefix)
].

^result.
)

class ParserWithNamespaceForStartEndTag =ParserWithNamespaceForStartTag(
"Parser that takes care of modifying the parsing context for namespace declarations for self closing tags."
|

|
)
('as yet unclassified'
parse: input inContext: context ifError: blk = (
|result|
result:: super parse: input inContext: context ifError: blk.
context popLevel.
^result
)

)

class ParserWithNamespaceForEndTag = CombinatorialParser (
"A parser that takes care of modyfing the parsing context for a end tag"
|
protected innerParser = nil.

|
)
('as yet unclassified'
forParser: parser = (
innerParser:: parser.
)

parse: input inContext: context ifError: blk = (
|result|
result:: innerParser parse: input inContext: context ifError: blk.
context popLevel.
^result
)


As shown here the start tag parser pushes a new scope with the new namespace declarations, while the end tag parser pops a scope.

Now to add this wrappers I created a new subclass of the parser with nodes to add this functionality.

class XmlParserWithNodesAndNamespaces = XmlParserWithXmlNodes (
"An XML Parser that creates a node tree and that resolves the namespaces."
|

|
)
('as yet unclassified'
ETag = (
|newWrappingParser|
newWrappingParser:: ParserWithNamespaceForEndTag new.
newWrappingParser forParser: (super ETag).
^newWrappingParser
)

EmptyElemTag = (
|newWrappingParser|
newWrappingParser:: ParserWithNamespaceForStartEndTag new.
newWrappingParser forParser: (super EmptyElemTag).
^newWrappingParser
)

STag = (
|tn attCollection newWrappingParser|
newWrappingParser:: ParserWithNamespaceForStartTag new.
newWrappingParser forParser: (super STag).
^newWrappingParser
)

)


Code organization


The code for this experiment is organized as follows:

class  XmlTools withParserLibClass: parserLibraryClass usingLib: platform = 
(
...
) (
class XmlParsing withParsingLib: parserLibrary = (
...
)
(
class XmlGrammar = ExecutableGrammar
( ...) ( ... )
class XmlParserWithXmlNodes = XmlGrammar
( ... ) ( ... )
class XmlParserWithNodesAndNamespaces = XmlParserWithXmlNodes
( ... ) ( ... )
...
)

basicParser = (
|parsingLib xmlparsing|
parsingLib:: parserLibraryClass usingLib: platform.
xmlparsing:: XmlParsing withParsingLib: parsingLib.
^xmlparsing XmlParserWithXmlNodes new.
)

parserWithNamespaceSupport = (
|parsingLib xmlparsing|
parsingLib:: ParserLibraryWithXmlContext new.
xmlparsing:: XmlParsing withParsingLib: parsingLib.
^xmlparsing XmlParserWithNodesAndNamespaces new.
)
...
)


Here the XmlTools class definition will represent a module for XML utilities. Its inner definitions include the XmlParsing inner class which defines the grammar along other parsing utilities. The basicParser parserWithNamespaceSupport show an example of how the parser is created.

The following methods show how the XmlTools class is used to create a concrete parser for a basic XML document:

getTestingNsParser = (
|platform|
platform:: Platform new.
^(XmlTools
withParserLibClass: BlocklessCombinatorialParsing
usingLib: platform) parserWithNamespaceSupport.
)

testElementWithOneChildWithNamespaces = (
|parser r ctxt|
parser:: xmlNsParserWrapper: (getTestingNsParser element) .
r:: parser parse: (streamFromString: '') .

assert:[r childNodes size = 1].
assert:[r name asString = 'myElement'].
assert:[r name namespace = 'http://foo'].
assert:[((r childNodes at: 1) name asString) = 'childElement1'].
assert:[((r childNodes at: 1) name namespace) = 'http://foo'].
)


Final words


The nicest think to notice is that the original class containing the grammar for XML was not modified in order to introduce this feature. In fact the parser with XML nodes without namespaces is also available . Also I really liked the way the ParserContext class was replaced which automatically allowed me to add this new functionality.

Code for this post can be found here.

Monday, May 24, 2010

A simple XML Grammar in Newspeak

Recently I've been doing some experiments for parsing XML in using Newspeak parser combinators.

Here's the grammar:


class XmlGrammar = ExecutableGrammar(
"Xml 1.0 grammar with namespaces"
|
openAB = char: $<.
closeAB = char: $>.
amp = char: $&.
semicolon = char: $; .
slash = char: $/.


topenAB = tokenFromChar: $<.
tcloseAB = tokenFromChar: $>.
tslash = tokenFromChar: $/.

comment = openAB , (char: $-),(char: $-),
((charExceptFor: $-) | ((char: $-), (charExceptFor: $-))) plus,
(char: $-),(char: $-),closeAB .

letter = (charBetween: $a and: $z) | (charBetween: $A and: $Z).
digit = charBetween: $0 and: $9.

colon = char: $:.

quote = (char:$') .
dquote = (char:$") .

eq = tokenFromChar: $= .

VersionNum = (char:$1), (char: $.) , (charBetween: $0 and: $9) plus.

VersionInfo = (tokenFromSymbol: #version), eq, ((quote, VersionNum,quote) | (dquote, VersionNum, dquote )).

EncName = letter, (letter | digit) star.

EncodingDecl = (tokenFromSymbol: #enconding) , eq , ((quote, EncName ,quote) | (dquote , EncName , dquote )).

yesNo = (tokenFromSymbol: #yes) | (tokenFromSymbol: #no).

SDDecl = (tokenFromSymbol: #standalone), eq, ((quote, yesNo ,quote) | (dquote , yesNo , dquote )).

XMLDecl = (char: $<) , (char: $?) ,(tokenFromSymbol: #xml), VersionInfo , EncodingDecl opt, SDDecl opt,
(tokenFromChar: $?), (char: $>).

dprolog = XMLDecl.

NameStartChar = letter | (char: $_) .

NameChar = NameStartChar | (char: $-) | (char: $.) | digit.

Name = NameStartChar, NameChar star.

QName = (Name, colon, Name)| Name.

TQName = tokenFor: QName.

EntityRef = amp, Name ,semicolon .

CharRef = amp, (char: $#), (((char:$x), (digit | letter) plus) | (digit plus)) ,semicolon .

Reference = EntityRef | CharRef.

AttributeContent1 = (charExceptForCharIn: {$< . $". $&. }) | Reference.


AttributeValue = (dquote, AttributeContent1 star,dquote) |
(quote, AttributeContent1 star,quote).

Attribute = TQName ,eq, AttributeValue.

EmptyElemTag = topenAB ,QName, Attribute star, tslash , closeAB .
STag = topenAB ,QName, Attribute star, tcloseAB .
ETag = topenAB ,slash,QName, closeAB .

CDStart = topenAB ,(char: $!),(char:$[),(tokenFromSymbol: #CDATA),(char:$[).
CDEnd = (char: $]),(char: $]),(char: $>).

CDSect = CDStart, (charExceptFor: $]) star , CDEnd.

CharData = tokenFor: ((charExceptForCharIn: {$&. $<}) plus).

content = CharData opt, ((element | Reference | CDSect), CharData opt) star.

ComplexElement = STag, content , ETag.

element = EmptyElemTag | ComplexElement .


|
)
...


Code for this experiment can be found here.

Thursday, March 11, 2010

Some basic image processing operations with F#

The previous post presented a way to access the image data from the Webcam using DirectShow.Net and F#. We can manipulate this data to do some basic image processing operations with it.

Converting image to gray scale


Many image processing operations and algorithms are defined for grayscale images. A simple way to convert the image to grayscale is the following:


let grayGrabber(transform) =
fun (width,height) ->
{ new ISampleGrabberCB with
member this.SampleCB(sampleTime:double , pSample:IMediaSample )= 0
member this.BufferCB(sampleTime:double , pBuffer:System.IntPtr , bufferLen:int) =
let grayImage = getGrayImage pBuffer bufferLen

let resultImage = transform width height grayImage

saveGrayImageToRGBBuffer resultImage pBuffer bufferLen
0
}


Given that we have:


let inline getGrayImage (data:IntPtr) (size:int) =
let grayImage = Array.create (size/3) (byte(0))
let pixelBuffer = Array.create 3 (byte(0))
let mutable it = 0
for i in 0..(size - 3 ) do
if (i + 1) % 3 = 0 then
Marshal.Copy(new System.IntPtr(data.ToInt32()+i),pixelBuffer,0,3) |> ignore
grayImage.[it] <- byte(float(pixelBuffer.[0])*0.3 +
float(pixelBuffer.[1])*0.59 +
float(pixelBuffer.[2])*0.11)
it <- it+1
grayImage

let inline saveGrayImageToRGBBuffer (grayImage:byte array) (data:IntPtr) (size:int) =
let mutable targetIndex = 0
for i in 0..(size/3 - 1) do
let p = grayImage.[i]
Marshal.WriteByte(data,targetIndex,p)
Marshal.WriteByte(data,targetIndex+1,p)
Marshal.WriteByte(data,targetIndex+2,p)
targetIndex <- targetIndex+3
()


The technique for converting the image to grayscale was taken from here.

Using this new grabber definition we can change the code from the previous post to do this:


let mediaControl,filterGraph = createVideoCaptureWithSampleGrabber
device
nullGrayGrabber
None


Given that nullGrayGrabber is defined as:

let nullGrayGrabber = grayGrabber (fun (_:int) (_:int) image -> image)


The original webcam output looks like this:


By applying this filter the webcam output looks like this:


Applying templates


With this definitions we can do a common operation in image processing called template convolution. Basically, this technique consists in applying an operation to each pixel of an image and its surrounding neighborhood . The operation is represented by a matrix, for example:


0.0 1.0 0.0
1.0 -1.0 1.0
0.0 1.0 0.0


To apply this template to the a pixel of the image at x',y' we write:


(0.0*image[x-1,y-1]) + (1.0*image[x,y-1]) + (0.0*image[x+1,y-1]) +
(1.0*image[x-1,y]) + (-1.0*image[x,y]) + (1.0*image[x+1,y]) +
(0.0*image[x-1,y+1]) + (1.0*image[x,y+1]) + (0.0*image[x+1,y+1])


The function to apply this kind of operation looks like this:

let convolveGray3 w h (image:byte array) (template:float[,]) hhalf whalf =

let result = Array.create (image.Length) (byte(0))

let getPixelGray' = getPixelGray w h image
let setPixelGray' = setPixelGray w h result

for y in (hhalf + 1) .. (h - ((Array2D.length1 template) - hhalf - 1) - 1 ) do
for x in (whalf + 1) .. (w - ((Array2D.length2 template) - whalf - 1) - 1 ) do

let mutable r = 0.0

for ty in 0 .. (Array2D.length1 template - 1) do
for tx in 0 .. (Array2D.length2 template - 1) do
let ir = getPixelGray' ( x + (tx - whalf)) ( y + (ty - hhalf))
r <- r + template.[ty ,tx ]*float(ir)

setPixelGray' x y (byte(Math.Abs r))

result


Given that:

let inline getPixelGray width height (image:byte array) x y  =
let baseHeightOffset = y*width
let offset = baseHeightOffset + x
image.[offset]

let inline setPixelGray width height (image:byte array) x y value1 =
let baseHeightOffset = y*width
let offset = baseHeightOffset + x
image.[offset] <- value1
()


We can represent operations such as edge detection or smoothing.
First order edge detection can be represented using the following template:


let firstOrderEdgeDetectTemplate =
(array2D [|[|2.0;-1.0|];
[|-1.0;0.0|];|])


Changing the code of the main program to the following:

let convGrayGrabber1 = 
grayGrabber (fun width height grayImage -> convolveGray3 width height grayImage firstOrderEdgeDetectTemplate 0 0 )


Now the output looks like:


We can also use a template template to represent averaging. This technique removes detail from the image by calculating the average value of pixel given its neighborhood. The definition of a function:

let averagingTemplate (windowSize) =
Array2D.create windowSize windowSize (1.0/float(windowSize*windowSize))


This function creates a template which looks like this:


> averagingTemplate 3;;
val it : float [,] = [[0.1111111111; 0.1111111111; 0.1111111111]
[0.1111111111; 0.1111111111; 0.1111111111]
[0.1111111111; 0.1111111111; 0.1111111111]]


We can change again the main program to use this function:

let averagingGrayGrabber = 
let template = averagingTemplate 3
grayGrabber (fun width height grayImage -> convolveGray3 width height grayImage template 1 1 )

...

let mediaControl,filterGraph = createVideoCaptureWithSampleGrabber
device
averagingGrayGrabber
None


The result image looks like this:


Final words


As with the previous post I'm using mainly the imperative features of F# . For future posts I'll try change this and also continue the exploration of image processing with F#.

Most of the techniques described here were taken from the "Feature Extraction & Image Processing" book by Mark S. Nixon and Alberto S. Aguado.

Code for this post can be found here.
Wednesday, February 24, 2010

Using a Webcam with DirectShowNET and F#

In this post I'm going to show a small F# example of using DirectShowNET to access a webcam and manipulate the image data.

DirectShow


DirectShow is a huge Windows API for video playback and capture. Among many things this API allows flexible access to data captured by video input devices such as a webcam.

DirectShowNET


The DirectShow is COM based API. According to the documentation, it's meant to be used from C++. Luckily there's DirectShowNET which is a very nice library that exposes the DirectShow interfaces to .NET languages .

Accessing the webcam


What I wanted to do for this example is to have access to the data of the image being captured at a given time. The DirectShow API provides the concept of a Sample Grabber which not only gives you access to the captured data, but also allows its modification .

The following example shows the use of a couple of functions defined below:


let device = findCaptureDevice

let mediaControl,filterGraph = createVideoCaptureWithSampleGrabber
device
nullGrabber
None


let form = new Form(Size = new Size(300,300), Visible = true,Text = "Webcam input")


let videoWindow = configureVideoWindow (form.Handle) 300 300 filterGraph

form.Closing.Add (fun _ ->
mediaControl.StopWhenReady()
Marshal.ReleaseComObject(videoWindow) |> ignore
Marshal.ReleaseComObject(mediaControl) |> ignore
Marshal.ReleaseComObject(filterGraph) |> ignore)


mediaControl.Run() |> ignore

Application.Run(form)


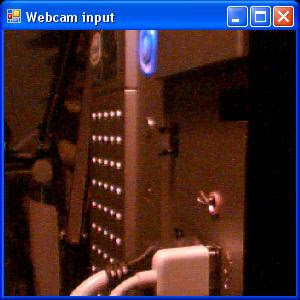
Running this program will show the following window:


Notice that we called the createVideoCaptureWithSampleGrabber function using the nullGrabber parameter. This parameter specifies a sample grabber that does nothing with the current frame. Here's the definition:


let nullGrabber =
fun (width,height) ->
{ new ISampleGrabberCB with
member this.SampleCB(sampleTime:double , pSample:IMediaSample )= 0
member this.BufferCB(sampleTime:double , pBuffer:System.IntPtr , bufferLen:int) = 0
}


We can change this sample grabber to something more interesting:


let incrementGrabber =
fun (width,height) ->
{ new ISampleGrabberCB with
member this.SampleCB(sampleTime:double , pSample:IMediaSample )= 0
member this.BufferCB(sampleTime:double , pBuffer:System.IntPtr , bufferLen:int) =
for i = 0 to (bufferLen - 1) do
let c = Marshal.ReadByte(pBuffer,i)
Marshal.WriteByte(pBuffer,i ,if c > byte(150) then byte(255) else c+byte(100))
0 }


We can change the program to use:


let mediaControl,filterGraph = createVideoCaptureWithSampleGrabber
device
incrementGrabber
None


Running the program we can see:


This new sample grabber increments each pixel value by 100 or leaves the maximum value to prevent overflow. As presented here the pixel information is provided as an unmanaged pointer.


Using DirectShowNet


DirectShow also has the concept of filters which are software components that are assembled together to mix various inputs and outputs. For this examples we're going to used only a couple of interfaces. The code for this post is based on the DxLogo sample provided with DirectShowNET.

First we define the module containing these functions:


module LangExplrExperiments.DirectShowCapture

open DirectShowLib
open System.Runtime.InteropServices
open System.Runtime.InteropServices.ComTypes


let private checkResult hresult = DsError.ThrowExceptionForHR( hresult )


The checkResult function is an utility function to check for the HRESULT of some of the calls to COM interfaces. Since DirectShowNET is a thin wrapper for these interfaces we need to use this function to check for errors.

The findCaptureDevice returns the first capture devices detected by DirectShowNET .


let findCaptureDevice =
let devices = DsDevice.GetDevicesOfCat(FilterCategory.VideoInputDevice)
let source : obj ref = ref null
devices.[0].Mon.BindToObject(null,null,ref typeof<IBaseFilter>.GUID,source)
devices.[0]


The following functions define the capture filter and sample grabber. The createVideoCaptureWithSampleGrabber function is the entry point. We can specify a file name as the final parameter to save the captured data to a video file.


let private ConfigureSampleGrabber( sampGrabber:ISampleGrabber,callbackobject:ISampleGrabberCB) =
let media = new AMMediaType()

media.majorType <- MediaType.Video
media.subType <- MediaSubType.RGB24
media.formatType <- FormatType.VideoInfo

sampGrabber.SetMediaType( media ) |> checkResult
DsUtils.FreeAMMediaType(media);

sampGrabber.SetCallback( callbackobject, 1 ) |> checkResult


let getCaptureResolution(capGraph:ICaptureGraphBuilder2 , capFilter:IBaseFilter) =
let o : obj ref = ref null
let media : AMMediaType ref = ref null
let videoControl = capFilter :?> IAMVideoControl

capGraph.FindInterface(new DsGuid( PinCategory.Capture),
new DsGuid( MediaType.Video),
capFilter,
typeof<IAMStreamConfig>.GUID,
o ) |> checkResult

let videoStreamConfig = o.Value :?> IAMStreamConfig;

videoStreamConfig.GetFormat(media) |> checkResult

let v = new VideoInfoHeader()
Marshal.PtrToStructure( media.Value.formatPtr, v )
DsUtils.FreeAMMediaType(media.Value)

v.BmiHeader.Width,v.BmiHeader.Height

let createCaptureFilter (captureDevice:DsDevice)
(sampleGrabberCBCreator: int*int -> ISampleGrabberCB) =
let captureGraphBuilder = box(new CaptureGraphBuilder2()) :?> ICaptureGraphBuilder2
let sampGrabber = box(new SampleGrabber()) :?> ISampleGrabber;
let filterGraph = box(new FilterGraph()) :?> IFilterGraph2
let capFilter: IBaseFilter ref = ref null

captureGraphBuilder.SetFiltergraph(filterGraph) |> checkResult

filterGraph.AddSourceFilterForMoniker(
captureDevice.Mon,
null,
captureDevice.Name,
capFilter) |> checkResult


let resolution = getCaptureResolution(captureGraphBuilder,capFilter.Value)
ConfigureSampleGrabber(sampGrabber, sampleGrabberCBCreator(resolution) )

filterGraph.AddFilter(box(sampGrabber) :?> IBaseFilter , "FSGrabberFilter") |> checkResult


captureGraphBuilder,filterGraph,sampGrabber,capFilter.Value

let getMediaControl (captureGraphBuilder :ICaptureGraphBuilder2)
(sampGrabber: ISampleGrabber)
(capFilter:IBaseFilter)
(filterGraph:IFilterGraph2)
(fileNameOpt:string option)=
let muxFilter: IBaseFilter ref = ref null
let fileWriterFilter : IFileSinkFilter ref = ref null
try
match fileNameOpt with
| Some filename ->
captureGraphBuilder.SetOutputFileName(
MediaSubType.Avi,
filename,
muxFilter,
fileWriterFilter) |> checkResult

| None -> ()

captureGraphBuilder.RenderStream(
new DsGuid( PinCategory.Capture),
new DsGuid( MediaType.Video),
capFilter,
sampGrabber :?> IBaseFilter,
muxFilter.Value) |> checkResult

finally
if fileWriterFilter.Value <> null then
Marshal.ReleaseComObject(fileWriterFilter.Value) |> ignore
if muxFilter.Value <> null then
Marshal.ReleaseComObject(muxFilter.Value) |> ignore

filterGraph :?> IMediaControl


let createVideoCaptureWithSampleGrabber (device:DsDevice)
(sampleGrabberCBCreator: int*int -> ISampleGrabberCB)
(outputFileName: string option) =
let capGraphBuilder,filterGraph,sampGrabber,capFilter = createCaptureFilter device sampleGrabberCBCreator

let mediaControl = getMediaControl capGraphBuilder sampGrabber capFilter filterGraph outputFileName

Marshal.ReleaseComObject capGraphBuilder |> ignore
Marshal.ReleaseComObject capFilter |> ignore
Marshal.ReleaseComObject sampGrabber |> ignore

mediaControl,filterGraph


Also for the creation of the video window the following function is provided:

let configureVideoWindow windowHandle width height (filterGraph:IFilterGraph2) =
let videoWindow = filterGraph :?> IVideoWindow

videoWindow.put_Owner(windowHandle) |> checkResult
videoWindow.put_WindowStyle(WindowStyle.Child ||| WindowStyle.ClipChildren) |> checkResult
videoWindow.SetWindowPosition(0,0,width,height) |> checkResult
videoWindow.put_Visible(OABool.True)|> checkResult

videoWindow


For future posts I'm going to try some experiments with the pixel data provided by the sample grabber.