Showing posts with label silverlight. Show all posts

Monday, January 31, 2011

IronPython & Silverlight Part VI: Using the TreeView control

In this post I'm going to show a small example of using the Silverlight 4 TreeView control with IronPython.

Referencing System.Windows.Controls.dll


Before we start using the TreeView control we need to add a reference to System.Windows.Controls.dll . This assembly can be found in the "Microsoft Silverlight 4 Tools for Visual Studio 2010" package.

You need to copy this assembly to the location of chiron.exe (ex. IronPython2.7\Silverlight\bin) and add a reference to it in the AppManifest.xaml file.

<Deployment xmlns="http://schemas.microsoft.com/client/2007/deployment" 
xmlns:x="http://schemas.microsoft.com/winfx/2006/xaml"
RuntimeVersion="4.0.50917.0"
EntryPointAssembly="Microsoft.Scripting.Silverlight"
EntryPointType="Microsoft.Scripting.Silverlight.DynamicApplication"
ExternalCallersFromCrossDomain="ScriptableOnly">
<!-- Add assembly references here -->
<Deployment.Parts>
...
<AssemblyPart Source="System.Windows.Controls.dll" />
</Deployment.Parts>
...
</Deployment>


Since we're using Silverlight 4 we need to change the runtime version to "4.0.50917.0" (see this post for more details).

Using the TreeView in XAML


Now that we have access to the assembly we can use it in app.xaml.

<UserControl x:Class="System.Windows.Controls.UserControl"
xmlns="http://schemas.microsoft.com/client/2007"
xmlns:x="http://schemas.microsoft.com/winfx/2006/xaml"
xmlns:sdk="clr-namespace:System.Windows.Controls;assembly=System.Windows.Controls"
xmlns:wsdk="clr-namespace:System.Windows;assembly=System.Windows.Controls">
<StackPanel x:Name="layout_root" Background="White">
<TextBlock x:Name="Message" FontSize="30" Text="TreeView experiment" />
<sdk:TreeView x:Name="tree">
<sdk:TreeView.ItemTemplate>
<wsdk:HierarchicalDataTemplate ItemsSource="{Binding nodes}">
<TextBlock Foreground="Red" Text="{Binding label}" />
</wsdk:HierarchicalDataTemplate>
</sdk:TreeView.ItemTemplate>
</sdk:TreeView>
</StackPanel>
</UserControl>


TreeView data binding


The XAML file above shows that we're binding the content of the tree view to the nodes property of the data source object. Here's the definition of the Python class used for this example:

from System.Windows import Application
from System.Windows.Controls import UserControl
from System import Object
from System.Collections.ObjectModel import ObservableCollection
import clrtype
import clr

clr.AddReferenceToFile('GalaSoft.MvvmLight.SL4.dll')

from GalaSoft.MvvmLight.Command import RelayCommand


class Node:
__metaclass__ = clrtype.ClrClass
__clrnamespace = "LangexplrExperiments"


def __init__(self,label,children):
self.text = label
self.children = children

@property
@clrtype.accepts()
@clrtype.returns(str)
def label(self):
return self.text

@property
@clrtype.accepts()
@clrtype.returns(Object)
def nodes(self):
return self.children


class App:
def __init__(self):
root = Application.Current.LoadRootVisual(UserControl(), "app.xaml")
root.tree.ItemsSource = [Node('level1',
[Node('level11',[]),
Node('level12',[Node('level121',[])])
])]


App()


With this changes we can run chiron.exe /b and we get:

Saturday, January 29, 2011

IronPython & Silverlight Part V: Using the MVVM Light Toolkit

In this post I'm going to show a small example of using the MVVM Light Toolkit in Silverlight with IronPython.

MVVM Light


According to its website, MVVM Light Toolkit is a:

...set of components helping people to get started in the Model - View - ViewModel pattern in Silverlight and WPF...

It provides useful elements such an implementation of "Relay Command" and a feature to expose events as commands (EventToCommand).

In the context of IronPython it will save us a lot of code.

Adding a reference to MVVM Light


There are several ways to add a reference to the MVVM Light Toolkit assembly. However the first step is to set the Silverlight version to 4 (see this post for more information).

Adding the reference using the manifest


One way to add the reference is to use the manifest AppManifest.xaml. Once we generated this file(using chiron.exe /m and copying it to app/) and changed the Silverlight version to 4 (see here) we can add an entry referencing the GalaSoft.MvvmLight.SL4.dll assembly.

<Deployment xmlns="http://schemas.microsoft.com/client/2007/deployment" 
xmlns:x="http://schemas.microsoft.com/winfx/2006/xaml"
RuntimeVersion="4.0.50401.0"
EntryPointAssembly="Microsoft.Scripting.Silverlight"
EntryPointType="Microsoft.Scripting.Silverlight.DynamicApplication"
ExternalCallersFromCrossDomain="ScriptableOnly">
<!-- Add assembly references here -->
<Deployment.Parts>
...
<AssemblyPart Source="GalaSoft.MvvmLight.SL4.dll"/>
...
</Deployment.Parts>
...
</Deployment>

Also we need to copy of the GalaSoft.MvvmLight.SL4.dll file to the chiron.exe folder (ex. IronPython\Silvelright\bin).


Using it in Python


Once we referenced this file using the manifest we need to reference it from code.
import clr
clr.AddReferenceToFile('GalaSoft.MvvmLight.SL4.dll')


Example


The following example shows the use of RelayCommand and ViewModelBase from IronPython.

app.xaml:

<UserControl x:Class="System.Windows.Controls.UserControl"
xmlns="http://schemas.microsoft.com/client/2007"
xmlns:x="http://schemas.microsoft.com/winfx/2006/xaml"
xmlns:wbc="clr-namespace:System.Windows.Controls">
<StackPanel Width="300" x:Name="layout_root" Background="White">
<TextBox x:Name="my_text_box"
Text="{Binding text_to_display, Mode=TwoWay}" />

<TextBlock Text="{Binding text_to_display}" />
<Button Content="Reset" Command="{Binding reset_command}"/>
</StackPanel>
</UserControl>


app.py:

import clr
clr.AddReferenceToFile('GalaSoft.MvvmLight.SL4.dll')
from System.Windows import Application
from System.Windows.Controls import UserControl
import System
import clrtype
from System.Windows import MessageBox
from GalaSoft.MvvmLight.Command import RelayCommand
from GalaSoft.MvvmLight import ViewModelBase

class MyBasicModel(ViewModelBase):
__metaclass__ = clrtype.ClrClass

def __init__(self):
self.text = 'Initial text'

@property
@clrtype.accepts()
@clrtype.returns(System.String)
def text_to_display(self): return self.text


@text_to_display.setter
@clrtype.accepts(System.String)
@clrtype.returns()
def text_to_display(self, value):
self.text = value
self.RaisePropertyChanged('text_to_display')

@property
@clrtype.accepts()
@clrtype.returns(System.Object)
def reset_command(self):
return RelayCommand(lambda: self.perform_reset_text() )

def perform_reset_text(self):
self.text_to_display = ''


class App:

def __init__(self):

self.model = MyBasicModel()
self.root = Application.Current.LoadRootVisual(UserControl(), "app.xaml")
self.root.DataContext = self.model


theApp = App()


Using this library from IronPython saves us from many thins such as having to declare events to comply with the INotifyPropertyChanged interface.

Tuesday, January 25, 2011

IronPython & Silverlight Part IV: Using Silverlight 4

The default Silverlight runtime version of programs created with IronPython 2.7 Beta 1 is "2.0.31005.0". If you want to take advantage of Silverlight 4 features you have to make a small change to AppManifest.xaml.


For example, say that you want to add a RichTextBox control(available on Silverlight 4).

<UserControl x:Class="System.Windows.Controls.UserControl"
xmlns="http://schemas.microsoft.com/client/2007"
xmlns:x="http://schemas.microsoft.com/winfx/2006/xaml"
xmlns:wbc="clr-namespace:System.Windows.Controls">
<StackPanel Width="300" x:Name="layout_root" Background="White">
<wbc:RichTextBox x:Name="rtb" />
<Button x:Name="my_button" Content="Ok"/>
</StackPanel>
</UserControl>


And

from System.Windows import Application
from System.Windows.Controls import UserControl
import System


class App:

def __init__(self):
self.theText = """
this
is
some
text"""


self.root = Application.Current.LoadRootVisual(UserControl(), "app.xaml")
self.root.rtb.Selection.Select(self.root.rtb.ContentStart, self.root.rtb.ContentEnd)
self.root.rtb.Selection.Text = self.theText

theApp = App()


In order to make this program work you have to add the AppManifest.xaml to the app/ folder of your application. You can get a copy of this file using chiron.exe /m :

By default this file looks like this:

<Deployment xmlns="http://schemas.microsoft.com/client/2007/deployment" 
xmlns:x="http://schemas.microsoft.com/winfx/2006/xaml"
RuntimeVersion="2.0.31005.0"
EntryPointAssembly="Microsoft.Scripting.Silverlight"
EntryPointType="Microsoft.Scripting.Silverlight.DynamicApplication"
ExternalCallersFromCrossDomain="ScriptableOnly">
<!-- Add assembly references here -->
<Deployment.Parts>
<!-- In the XAP -->
<!-- <AssemblyPart Source="Foo.dll" /> -->
<!-- Outside the XAP, same domain -->
<!-- <AssemblyPart Source="/Foo.dll" /> -->
<!-- Outside the XAP, different domain -->
<!-- <AssemblyPart Source="http://bar.com/Foo.dll" /> -->
<AssemblyPart Source="Microsoft.Scripting.Silverlight.dll" />
<AssemblyPart Source="System.Numerics.dll" />
<AssemblyPart Source="Microsoft.Scripting.dll" />
<AssemblyPart Source="Microsoft.Dynamic.dll" />
<AssemblyPart Source="IronPython.dll" />
<AssemblyPart Source="IronPython.Modules.dll" />
</Deployment.Parts>
<!-- Add transparent platform extensions (.slvx) references here -->
<Deployment.ExternalParts>
<!-- Example -->
<!-- <ExtensionPart Source="http://bar.com/v1/Foo.slvx" /> -->
</Deployment.ExternalParts>
...
</Deployment>


After copying this file to the app/ folder you have to change the RuntimeVersion attribute value to "4.0.50401.0".

Now to can run the application and have access to Silverlight 4 features.

Wednesday, December 15, 2010

IronPython & Silverlight Part III: Basic Data Binding

One of the nicest features of Silverlight is data binding. This feature allows you to perform and receive changes on the UI without explicitly adding or removing elements from UI controls. For example:

<TextBox Text="{Binding TextToDisplay}">


This XAML code says that the value of the Text property is bound to the TextToDisplay property of the of the object specified by the DataContext property.

As with other Silverlight features data binding requires you to use a .NET object with properties. We can use clrtype to take advantage of this feature with IronPython.

For example, say that we want to bind a text property to a Python object to a TextBox:

<UserControl x:Class="System.Windows.Controls.UserControl"
xmlns="http://schemas.microsoft.com/client/2007"
xmlns:x="http://schemas.microsoft.com/winfx/2006/xaml">
<StackPanel Width="300" x:Name="layout_root" Background="White">
<TextBox x:Name="my_text_box"
Text="{Binding text_to_display, Mode=TwoWay}" />
<Button x:Name="my_button" Content="Show text"/>
</StackPanel>
</UserControl>


The app.py file looks like this:


from System.Windows import Application
from System.Windows.Controls import UserControl
import System
import clrtype
from System.Windows import MessageBox

class MyData:
__metaclass__ = clrtype.ClrClass

def __init__(self):
self.text = 'Initial text'

@property
@clrtype.accepts()
@clrtype.returns(System.String)
def text_to_display(self): return self.text


@text_to_display.setter
@clrtype.accepts(System.String)
@clrtype.returns()
def text_to_display(self, value):
self.text = value

class App:

def handle_click(self, sender, event_args):
MessageBox.Show(self.data.text)

def __init__(self):
self.data = MyData()
self.root = Application.Current.LoadRootVisual(UserControl(), "app.xaml")
self.root.my_text_box.DataContext = self.data
self.root.my_button.Click += lambda s,ea: self.handle_click(s,ea)

theApp = App()


Here the definition of MyData is decorated with the information on how to generate the .NET class elements to be exposed .


Since the binding is declarated as TwoWay modifications to the TextBox are reflected in the data instance.


As with Part I and Part II of these series, IronPython 2.7 beta 1 is used for all examples.

Tuesday, December 7, 2010

IronPython & Silverlight Part II: Basic event handling

There are a couple of ways to add event handlers to Silverlight controls. The common way is to add the event handlers directly in XAML. For example:

<Button x:Name="ButtonGo" Content="Go!" Click="MyClickHandler" />


Given that there's a definition for the MyClickHandler method in your C# code. However for IronPython there's a couple of options:

Directly in Python code


Event handlers can be added as in C# by using the '+=' operator. For example say that you have the following XAML code describing an UserControl:

<UserControl x:Class="System.Windows.Controls.UserControl"
xmlns="http://schemas.microsoft.com/client/2007"
xmlns:x="http://schemas.microsoft.com/winfx/2006/xaml">

<StackPanel Width="300" x:Name="layout_root" Background="White">
<TextBlock x:Name="Message" FontSize="30" />
<Button x:Name="ButtonGo" Content="Go!" />
</StackPanel>
<UserControl.Resources>
<Storyboard x:Name="MyStoryboard">
<DoubleAnimation
Storyboard.TargetName="Message"
Storyboard.TargetProperty="Opacity"
From="1.0" To="0.0" Duration="0:0:3"
AutoReverse="True"
RepeatBehavior="Forever"/>
</Storyboard>
</UserControl.Resources>
</UserControl>


Say we want to start the 'MyStoryboard' animation in the event handler for the Click event of the ButtonGo button. We can write:

from System.Windows import Application
from System.Windows.Controls import UserControl

def handle_click(sender, event_args):
theApp.root.MyStoryboard.Begin()

class App:

def __init__(self):
self.root = Application.Current.LoadRootVisual(MyUserControl(), "app.xaml")
self.root.Message.Text = "Welcome to Python and Silverlight!"
self.root.ButtonGo.Click += handle_click

theApp = App()


Using clrtype


The clrtype module can be used to define .NET classes from (Iron)Python classes . This module can be found in the IronPython samples package or here in the GitHub repository. The GUI Automated Testing blog has some nice tutorials on using clrtype.

To use this module, you have to copy the clrtype.py file to your app/ folder.

We can change the code this way:

from System.Windows import Application
from System.Windows.Controls import UserControl
from System.Windows import MessageBox
import System
import clrtype

class MyUserControl(UserControl):
__metaclass__ = clrtype.ClrClass

_clrnamespace = "MyNs"

@clrtype.accepts(System.Object, System.EventArgs)
@clrtype.returns(System.Void)
def my_click_handler(self, sender, event_args):
theApp.root.MyStoryboard.Begin()


def __getattr__(self, name):
return self.FindName(name)

def handle_click(sender,event_args):
theApp.root.MyStoryboard.Begin()

class App:

def __init__(self):
self.root = Application.Current.LoadRootVisual(MyUserControl(), "app.xaml")
self.root.Message.Text = "Welcome to Python and Silverlight!"

theApp = App()


With these definitions we can change the XAML code for the Button to have be:

<Button x:Name="ButtonGo" Content="Go!" Click="my_click_handler"/>


Notice that the definition of MyUserControl has a definition for __getattr__. This definition is used to still be able to access the definitions of child controls for example theApp.root.MyStoryboard.

Final words


Another way to do event handling is to use Commanding. This approach is preferred for MVVM. For future posts I'll try to cover the use of Commanding with IronPython.

Tuesday, November 30, 2010

Using IronPython with Silverlight, Part I

This is the first of series of posts on the topic of using IronPython to create Silverlight programs. Experimenting with these technologies is nice because you only need a text editor and the IronPython distribution.

Getting started


In these series of posts I'll be using IronPython 2.7 (which is in beta right now) and Silverlight 4 .

Once these packages are installed the first step is to copy a basic program template to a your work directory. The template is located in (IronPython path)\Silverlight\script\templates\python.

This template contains the following structure:


C:.
¦ index.html
¦
+---app
¦ app.py
¦ app.xaml
¦
+---css
¦ screen.css
¦
+---js
error.js


The app.py and app.xaml files contain the code for the entry point of the demo Silverlight application. The index.html file contains the Silverlight control host.

The default app.xaml code looks like this:

<UserControl x:Class="System.Windows.Controls.UserControl"
xmlns="http://schemas.microsoft.com/client/2007"
xmlns:x="http://schemas.microsoft.com/winfx/2006/xaml">

<Grid x:Name="layout_root" Background="White">
<TextBlock x:Name="Message" FontSize="30" />
</Grid>

</UserControl>


The default app.py code looks like this:

from System.Windows import Application
from System.Windows.Controls import UserControl

class App:
def __init__(self):
root = Application.Current.LoadRootVisual(UserControl(), "app.xaml")
root.Message.Text = "Welcome to Python and Silverlight!"

App()


As you can see this code loads the XAML file for defining the 'root visual' . The 'root.Message.Text = ...' assignment changes the text displayed by the 'Message' TextBlock instance. Notice that it uses the name of the control as if it were a member of the UserControl instance returned by LoadRootVisual. This is accomplished by using a DLR feature defined in the FrameworkElementExtension class (see ExtensionTypes.cs )

You can easily run this example by going to the command line and running Chiron:

C:\development\blog\ipy\basictest>c:\development\IronPython-2.7\Silverlight\bin\Chiron.exe /b
Chiron - Silverlight Dynamic Language Development Utility. Version 1.0.0.0
Chiron serving 'C:\development\blog\ipy\basictest' as http://localhost:2060/
21:03:45 200 1,185 /
21:03:45 200 792 /style.css!
21:03:45 200 2,492 /sl.png!
21:03:45 200 642 /slx.png!
21:03:49 404 580 /favicon.ico [Resource not found]


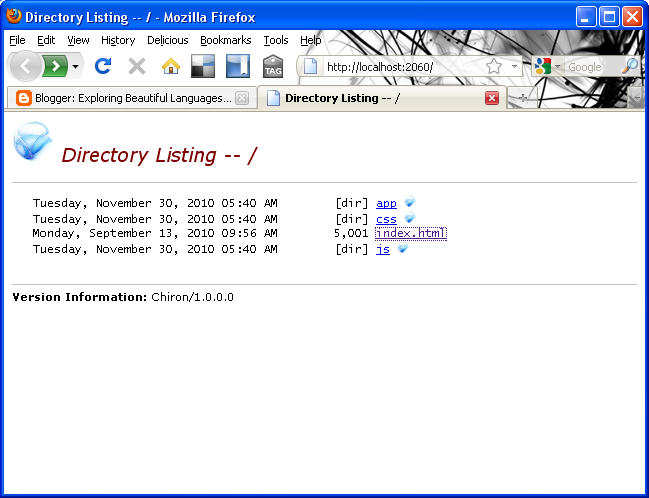
Running Chiron this way will start the web server and will open a web browser in its root.


(Note: For IronPython 2.7 Beta you have to copy the System.Numerics.dll assembly in the %IPY_HOME\Silverlight\bin folder, this file could be found in the Silverlight SDK distribution).

When you select the index.html file the Silverlight program is executed.


As you can see an IronPython REPL console is activated by default in this template. This console is activated by using the following tag in the HTML file.

<param name="initParams" value="reportErrors=errorLocation, console=true" />


The nice thing about this is that you can manipulate the Silverlight application while is executing. To see an example of this, we can change the definition of the App class to be like this:

class App:

def __init__(self):
self.root = Application.Current.LoadRootVisual(UserControl(), "app.xaml")
self.root.Message.Text = "Welcome to Python and Silverlight!"

theApp = App()


With this change we can now have access to the UI elements defined in XAML. For example:


For future posts I'm going to talk about specific topics on the use of Silverlight and IronPython.

A nice source of information on this topic is the following page by Michael Foord "Python in your Browser with Silverlight"

Thursday, August 21, 2008

Using Emacs and nXML to edit XAML files

In this post I'll show how to use Emacs and nXML to edit XAML files.

The powerful nXML mode allows the use a RELAX NG schema to validate and to assist the edition of XML documents.

The RELAX NG schema generated in the previous post is used to provide XAML code completion.

As described in the previous post, not all elements of XAML could be mapped to RELAX NG, so validation errors will be displayed on valid documents.

Once you have Emacs and nXML installed the following line could be added to the .emacs file to activate nXML when a XAML file is opened.


(setq auto-mode-alist (cons '("\.xaml$" . nxml-mode) auto-mode-alist))


Also the mode could be activated by typing M-x nxml-mode.

Once a file is opened with the nXML mode, the schema must be specified for that file. The XML -> Set Schema -> File... option is used to specify the silverlight.rnc file created for the previous post.

Setting the XAML schema

Once the schema is load we can start modifying the file. For example the following screenshot shows the result of pressing Control+Enter (C-Return) inside a DoubleAnimation tag.

Presenting available attributes

All the available attributes are presented as possible options.

In several scenarios the schema presents only the valid options for a given context. For example the following screenshot shows the result of pressing Control+Enter after an opening angle bracket inside a StackPanel tag:

Emacs displaying possible options for a StackPanel child

Properties elements are also available, for example the following screenshot shows, available options by pressing Control+Enter after the "<Line." text:

Property Element completion


Code for this post can be found here.

Monday, August 11, 2008

Creating an XSD schema from classes using XAML rules with IronRuby

This post presents a little unfinished experiment for creating an XSD Xml Schema definition from classes based on some of the rules to map XAML documents to objects. The program is written in IronRuby and it uses reflection to inspect classes and generate the schema definition.

The goal is to have an XML Schema that could be used in conjunction with an XML editor to create XAML documents (which is useful for those of us who don't have a full Visual Studio version). Although as the XAML Overview document says, there are elements that could not be completely mapped to an schema definition, some of them are mentioned below.

The Silverlight Visual Studio integration already includes a very nice XAML editing capabilities.

I think this experiment is a great way to learn more about IronRuby and how to use it to call .NET Libraries.

The strategy

What the program will do is to navigate all the classes inheriting from System.Windows.DependencyObject and generate and XML element and a complex type definition with all the properties included in the definition. For this experiment only two mappings are implemented: properties and content properties.

Properties

As the XAML Overview document describes two ways for specifying properties:


  1. By using XML attributes

  2. By using a class.property-name element


This means that:

This


<Button Background="Blue" >
...
</Button>


and


<Button>
<Button.Background>
<SolidColorBrush Color="Blue">
</Button.Background>
...
</Button>


are equivalent.

So the alternative is to create both the attribute and the property element definitions in the schema.

Content properties

For elements that contain the ContentPropertyAttribute a special child element will be created with a reference to a sequence of all identified concrete elements that in inherit from the property type. As discussed below, this definition is not complete for content properties that accept basic types such as a string.


The program

Some constant and variable definitions


require 'mscorlib'
require 'System.Xml, Version=2.0.0.0, Culture=neutral, PublicKeyToken=b77a5c561934e089, processorArchitecture=MSIL'
include System::Xml
include System::Reflection

SILVERLIGHT_FOLDER = "c:\\Program files\\Microsoft Silverlight\\2.0.30523.8\\"
BASE_TYPE_NAME = "System.Windows.DependencyObject"
CONTENT_PROPERTY_ATTRIBUTE = "System.Windows.Markup.ContentPropertyAttribute"

SILVERLIGHT_NAMESPACE = "http://schemas.microsoft.com/client/2007"
EXTRA_ATTRIBUTES_NAMESPACE = "http://schemas.microsoft.com/winfx/2006/xaml"
XSD_NAMESPACE = "http://www.w3.org/2001/XMLSchema"
CONCRETE_ELEMENTS_GROUP_NAME = "UIElementsGroup"

PRESENTATION_FRAMEWORK_COLLECTION_BASE_TYPE = "PresentationFrameworkCollection`1"


The main program

The main program looks like this:


begin

silveright_system_assembly = Assembly.reflection_only_load_from(SILVERLIGHT_FOLDER + "system.dll")
silveright_windows_assembly = Assembly.reflection_only_load_from(SILVERLIGHT_FOLDER + "System.Windows.dll")
silveright_core_assembly = Assembly.reflection_only_load_from(SILVERLIGHT_FOLDER + "System.Core.dll")
silveright_net_assembly = Assembly.reflection_only_load_from(SILVERLIGHT_FOLDER + "System.Net.dll")
silveright_xml_assembly = Assembly.reflection_only_load_from(SILVERLIGHT_FOLDER + "System.Xml.dll")


registry = Registry.new(silveright_windows_assembly)

registry.collect_data

registry.generate_xsd_schema
puts 'Done!'

rescue System::Reflection::ReflectionTypeLoadException => tl
puts tl
puts tl.LoaderExceptions
rescue System::IO::FileLoadException => e
puts e
puts "-----"
puts e.FusionLog
end


As presented here, the program first collects data about the classes stored in the System.Windows.dll Silverlight library and then generate the XSD schema definition.

The Registry class

The Registry class stores information on the identified classes and keeps track of element groups to be generated.

The collect_data method of the Registry class looks like this:


class Registry

def initialize(types_assembly)
@groups = {}
@types_assembly = types_assembly
@additional_types = {}
@classes = {}
end

...

def get_or_create(name,registry)
if @classes.has_key? name
return @classes[name]
else
return (@classes[name] = ClassNode.new(name,nil,registry))
end
end


...

def collect_data
base_type = @types_assembly.GetType(BASE_TYPE_NAME)
@classes[base_type.FullName] = RootClassNode.new(BASE_TYPE_NAME,base_type,self)

@types_assembly.get_types.each do |a_type|
if (base_type.is_assignable_from a_type and base_type.FullName != a_type.FullName )
node = get_or_create(a_type.full_name,self)
node.the_type = a_type
parent = get_or_create(a_type.BaseType.full_name,self)
parent.add_child(node)

puts "Adding #{a_type.FullName}"
end
end
end

end


As shown here the collect_data method iterates all the classes in the assembly, asking for elements that descend from System.Windows.DependencyObject. For each of these classes an instance of the ClassNode class is created.
If you are familiar with the .NET Reflection API you will recognize some of the names presented here such as is_assignable_from which is a call to the IsAssignableFrom method. As described here, IronRuby allows you to call existing .NET method names using Ruby naming convention .

Generating the Schema

The XSD schema is generated in the generate_xsd_schema Registry method which looks like this:


def generate_xsd_schema
base_type = @types_assembly.GetType(BASE_TYPE_NAME)
swriter = System::IO::StreamWriter.new("silveright.xsd")
writer_settings = XmlWriterSettings.new()
writer_settings.Indent = true
w = XmlWriter.Create(swriter,writer_settings)
w.write_start_document
w.write_start_element("schema",XSD_NAMESPACE)
w.write_attribute_string("targetNamespace",SILVERLIGHT_NAMESPACE)
w.write_attribute_string("elementFormDefault","qualified")
w.write_attribute_string("xmlns","sl",nil,SILVERLIGHT_NAMESPACE)
w.write_attribute_string("xmlns","x",nil,EXTRA_ATTRIBUTES_NAMESPACE)

w.write_start_element("import",XSD_NAMESPACE)
w.write_attribute_string("namespace",EXTRA_ATTRIBUTES_NAMESPACE)
w.write_attribute_string("schemaLocation","extraxamldefs.xsd")
w.write_end_element()

@classes[base_type.FullName].write_schema_definition(w)


create_additional_type_definitions(w)
create_concrete_elements_group(w)

w.write_end_element
w.write_end_document

w.Close
swriter.Close
end


As shown here a .NET XmlWriter class is used to generate the schema.

The write_schema_definition of the RootClassNode and ClassNode classes generates all the appropriate definitions for each class.


For the RootClassNode which represents classes that don't inherit from the DependencyObject the code looks like this:


class RootClassNode
attr_accessor :name,:the_type,:children

def initialize(name,the_type,registry)
@the_type = the_type
@name = name
@children = {}
@registry = registry
end

...

def write_schema_definition(writer)
ctype_name = @the_type.Name.to_s+"Type"
writer.write_start_element("complexType",XSD_NAMESPACE)
writer.write_attribute_string("name",ctype_name )

write_inner_elements_definition(writer) unless is_abstract

write_properties_definition(writer)
if (@the_type.FullName.to_s == BASE_TYPE_NAME)
writer.write_start_element("attributeGroup",XSD_NAMESPACE)
writer.write_attribute_string("ref","x:extraAttributes")
writer.write_end_element
end

writer.write_end_element

write_element_definition(writer,ctype_name) unless is_abstract

@children.values.each {|c| c.write_schema_definition(writer)}
end

end


A complex type is generated with the content of the current class. The write_inner_elements_definition method writes all the description of the child nodes for this complexType, for example it writes the property/element definitions and child node references. The write_properties_definition
method writes the attribute definitions for all the properties.

Also for all base types, a reference to an attribute group of "extraAttributes" is generated. This attribute group contains reference to definitions for some of the XAML attributes such as x:Name. More information about these attributes can be found in XAML Namespace (x:) Language Features.

Finally an element definition is created if the class is not abstract.

For classes inheriting from DependencyObject, a ClassNode instance is created.


class ClassNode < RootClassNode

def write_schema_definition(writer)

if @the_type.contains_generic_parameters
ctype_name = @the_type.Name.to_s.gsub(/`/,'')+"Type"
else
ctype_name = @the_type.Name.to_s + "Type"
end

writer.write_start_element("complexType",XSD_NAMESPACE)
writer.write_attribute_string("name",ctype_name )

writer.write_start_element("complexContent",XSD_NAMESPACE)
writer.write_start_element("extension",XSD_NAMESPACE)
writer.write_attribute_string("base","sl:#{@the_type.BaseType.Name}Type")
write_inner_elements_definition(writer) unless is_abstract
write_properties_definition(writer)
writer.write_end_element


write_element_definition(writer,ctype_name) unless is_abstract

@children.values.each {|c| c.write_schema_definition(writer)}
end
end


The main difference with BaseClassNode is that a complex type extension to the base type is generated. This will reduce the number of attribute definitions of each complex type.

Writing child node references

In order to allow sequences of heterogeneous elements as child nodes of XAML elements, a group definition is created with a choice that references every concrete type.

For example for elements that have a content property of type UIElement the following group is generated:


<group name="UIElementGroup">
<choice>
<element ref="sl:Path" />
<element ref="sl:Ellipse" />
<element ref="sl:Line" />
<element ref="sl:Polygon" />
<element ref="sl:Polyline" />
<element ref="sl:Rectangle" />
...
</choice>
</group>


Combining Enum values

The only way, that I could find, for combining .NET Enum values was to use a combination of Convert.ToInt32 and Enum.ToObject. The following function was used to do that.


def combine(enum_type,enum_values)
System::Enum.ToObject(
enum_type.to_clr_type,
((enum_values.map {|e_value|
System::Convert.ToInt32(e_value)}).inject {|i,j| (j | i)}))
end


A use of this function for combining BindingFlags looks like this:


p = @the_type.get_property(
c.to_string,
combine(BindingFlags,
[BindingFlags.Instance,
BindingFlags.Public,
BindingFlags.NonPublic]))

result_type = p.PropertyType


Elements not mapped

As mentioned at the beginning of the document, not all XAML document features can be accurately represented using XSD. Some of the things that I noticed:


  • Couldn't find a way to define attached properties. A possible workaround is to generate all possible attached property definitions

  • Content properties that allow strings are not represented. This is difficult since it has conflicts with the property/element definitions. Mixed content could be a possible workaround.

  • Extensibility: no easy way to represent things outside of System.Windows. This is a very difficult problem, maybe things like substitution groups could help to represent future child nodes.


Using the generated schema

With the schema generated, an XML editor with XSD Schema aware completion can be used. For example here it is used in Eclipse with XML editor tools included in WTP.


I tried to use the schema with the Netbeans 6.1 IDE (which was used as the Ruby editor for this code) however for schema completion it requires you to specify the schemaLocation attribute. Using this attribute or declaring the xsi namespace generates an error when the XAML is loaded at runtime!.


Code and generated schema for this post can be found here.

Tuesday, July 29, 2008

A quick look at Silverlight with IronRuby

This post presents a little Silverlight program written using IronRuby that exercises features such as graphics, dynamic language interaction and style separation.

This is the second of series of posts that explore features across different platforms such as JavaFX Script or Flex. The first post can be found here.

Code is this post is based on Silverlight 2 Beta 2.

The example

As described in the previous post:


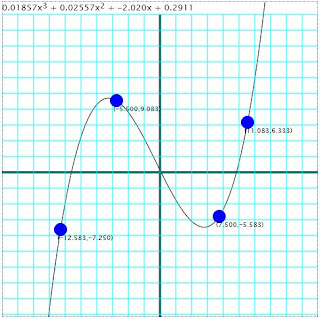
A little program that calculates and plots a polynomial that touches four points selected by the user. The user can move any of the given points in the screen and the polynomial will be recalculated and replotted while moving it.


The Neville's algorithm is used in order to find the polynomial that touches all the given points.

Dynamic languages and Silverlight

The Silverlight web site provides documentation and examples to get you started using dynamic languages with Silverlight also the Silverlight Dynamic Languages SDK provides examples and useful code templates.

However, most of the documentation that talks about specific features of Silverlight focused in working with C#.

One of the thing that I wanted to explore was to use the data binding feature, however I didn't find a way to use it in conjunction with IronRuby classes.

John Lam's blog is a good place to find specific samples for working with IronRuby and Silverlight.

One of the benefits of working with dynamic languages and Silveright is that it's very easy to just start trying examples and experiment with it. You only need the Silverlight 2 SDK beta 2 and any text editor (no Visual Studio is required). The Chiron local web server is a very useful tool that let's you execute the Silverlight program and let's you see the changes just by just refreshing the page.


The program

The final program looks like this:


The running version of this program can be found here.

Polynomial class

The following program shows the implementation of the Polynomial class.

class Polynomial
def initialize(coefficients)
@coefficients = coefficients
end
def evaluate(x)
i = @coefficients.length - 1
result = 0.0
while (i >= 0)
result += (x**i)*@coefficients[i]
i = i - 1
end
return result
end

def coefficients
@coefficients
end


def add(p)

if @coefficients.length > p.coefficients.length
c1 = @coefficients
c2 = p.coefficients
else
c1 = p.coefficients
c2 = @coefficients
end
length1 = c1.length
length2 = c2.length

result = (0..length1-1).map do |i|
if i < length2
c1[i]+c2[i]
else
c1[i]
end
end

return Polynomial.new(result)
end

def add_destructive(p)

if @coefficients.length > p.coefficients.length
c1 = @coefficients
c2 = p.coefficients
else
c1 = p.coefficients
c2 = @coefficients
end

length2 = c2.length

(0..length2-1).each do |i|
c1[i] = c1[i]+c2[i]
end

return Polynomial.new(c1)
end


def multiply(p)
results = Array.new(p.coefficients.length+@coefficients.length - 1,0.0)
current_exponent = 0
p.coefficients.each do |coefficient|
if coefficient.abs > 0.000001
current_self_exponent = 0
@coefficients.each do |self_coefficient|
results[current_self_exponent+current_exponent] = (self_coefficient*coefficient) + results[current_self_exponent+current_exponent]
current_self_exponent = current_self_exponent + 1
end
end
current_exponent = current_exponent + 1
end

Polynomial.new(results)
end
end


This class contains a couple of methods for polynomial evaluation, addition and multiplication. These operations are required to implement the algorithm.

Algorithm

The following code shows the implementation of Neville's algorithm.


class NevilleCalculator
def initialize(converter)
@converter = converter
end
def create_polynomial(points)
number_of_points = points.length
matrix = (0..number_of_points-1).map {|i|(0..i).map{|j| Polynomial.new([])}}
(0..number_of_points-1).each do |i|
matrix[i][0] = Polynomial.new([@converter.convert_to_plane_y(points[i].y)])
end
xs = points.map {|point| @converter.convert_to_plane_x(point.x) }

(1..number_of_points-1).each do |i|
(1..i).each do |j|
q = xs[i]-xs[i-j]
p1 = Polynomial.new [-1.0*xs[i-j]/q,1.0/q]
p2 = Polynomial.new [xs[i]/q,-1.0/q]
matrix[i][j] = p1.multiply(matrix[i][j-1]).add_destructive(p2.multiply(matrix[i-1][j-1]))
end
end

return matrix[number_of_points-1][number_of_points-1]
end
end


The create_polynomial method receives an array of user selected points in the screen. The converter object (described below) converts coordinates from the screen to the Cartesian coordinate system.

Screen to plane coordinate conversion

In order to convert the coordinates the Converter class was used.


class PlaneToScreenConverter
def initialize(screen_max_x,screen_min_x,screen_max_y,screen_min_y,
plane_max_x,plane_min_x,plane_max_y,plane_min_y)
...
@m_to_plane_x = ((@plane_max_x - @plane_min_x)/(@screen_max_x - @screen_min_x))
@b_to_plane_x = @plane_min_x- @screen_min_x*@m_to_plane_x

@m_to_plane_y = ((@plane_max_y - @plane_min_y)/(@screen_max_y - @screen_min_y))
@b_to_plane_y = @plane_min_y - @screen_min_y *@m_to_plane_y

end

...

def convert_to_screen_x(x)
m = ((@screen_max_x - @screen_min_x)/(@plane_max_x - @plane_min_x))
b = @screen_min_x - @plane_min_x*m
return (m*x + b)
end
def convert_to_screen_y(y)
m = ((@screen_max_y - @screen_min_y)/(@plane_max_y - @plane_min_y))
b = @screen_min_y - @plane_min_y*m
return (m*y + b)
end
def convert_to_plane_x(x)
return (@m_to_plane_x*x + @b_to_plane_x)

end
def convert_to_plane_y(y)
return (@m_to_plane_y*y + @b_to_plane_y)
end
end


Also a class to represent a user selected point was created:


class ScreenPoint
def x
@x
end

def x=(v)
@x = v
end

def y
@y
end

def y=(v)
@y = v
end
def initialize(x,y)
@x = x
@y = y
end
end


For some reason I couldn't use attr_accessor with the version of IronRuby shipped with the Silverlight SDK 2 Beta 2.

Plotting the polynomial

In order to plot the polynomial a Polyline object will be used. The FunctionPlotter class is used to create the list of points to create the list of Polyline points.


class FunctionPlotter
def initialize(converter,steps,polynomial)
@converter = converter
@steps = steps
@polynomial = polynomial
@points = []
end

def points
@points
end
def polynomial
@polynomial
end
def recalculate_points

increment = ((@converter.plane_max_x - @converter.plane_min_x)/@steps).abs
current_x = [@converter.plane_max_x,@converter.plane_min_x].min
@points = (0..@steps - 1).map do
x = current_x
y = @polynomial.evaluate(x)
current_x = current_x+increment
[x,y]
end
end
end


Dragging elements

Since the user can modify the points across the screen, a way to drag shapes is required. The Implementing Drag-and-Drop Functionality with Mouse Events and Capture (Silverlight 2) article provides a complete guide on how add dragging capabilities to a Silverlight shape.

Here's the implementation of a helper class that implements this functionality.


class ElementDraggingTracker
def is_captured
return @captured
end
def initialize
@captured = false
@last_position = ScreenPoint.new(0,0)
end

def handle_mouse_down(sender,e)
current_pos = e.GetPosition(nil)
@last_position.x = current_pos.X
@last_position.y = current_pos.Y
@captured = true
sender.CaptureMouse()
end
def handle_mouse_move(sender,e)
if @captured
new_position = e.GetPosition(nil)
deltav = new_position.Y - @last_position.y
deltah = new_position.X - @last_position.x
sender.Data.Center = Point.new(sender.Data.Center.X+deltah,sender.Data.Center.Y+deltav)
@last_position.x = new_position.X
@last_position.y = new_position.Y
end
end
def handle_mouse_up(sender,e)
sender.ReleaseMouseCapture()
@captured = false
end
end


This implementation was made to work only with Path objects that have an EllipseGeometry as the Data. That's why the Data and Center properties are used. This code could be improved to be independent of the object being dragged.

Presenting the polynomial

In order to show a textual representation of the calculated polynomial, a sequence of TextBlock objects was used. This was necessary since I wanted to show the exponent of each term of the polynomial. The only way I found to do that was to add an horizontal StackPanel and add TextBlock for each term and use a TranslateTransform for the exponents. Here's the code:


def create_polynomial_text_elements(p)
first_time = false
panel = polyTextPanel

panel.Children.Clear
length = p.coefficients.length
(0..length-1).each do |pos|
i = (length - 1) - pos
c = p.coefficients[i]
exponent = i

if c.abs > 0.000001 then
text = ""
text = text + ("%.4g" % c)
text = text + "x" if exponent > 0

b = create_text_block text,"FormulaTextStyle"
panel.Children.Add b
if exponent > 1
b = create_text_block exponent.to_s,"FormulaExponentTextStyle"
t = TranslateTransform.new
t.Y = -2
b.RenderTransform = t
panel.Children.Add b
end

if !first_time and exponent != 0
b = create_text_block " + " ,"FormulaTextStyle"
panel.Children.Add b
else
first_time = false
end
end

end
end
end


The main program

The XAML for this program is very simple:


<UserControl x:Class="System.Windows.Controls.UserControl"
xmlns="http://schemas.microsoft.com/client/2007"
xmlns:x="http://schemas.microsoft.com/winfx/2006/xaml"
x:Name="ucontrol">
<UserControl.Resources>

...

</UserControl.Resources>
<StackPanel>
<StackPanel x:Name="polyTextPanel" Orientation="Horizontal">
</StackPanel>
<Canvas x:Name="theCanvas" Width="480" Height="480" Background="White">
<Polyline x:Name="polynomialPolyline" Style="{StaticResource PolylineStyle}"/>
<Line Style="{StaticResource AxisLineStyle}" X1="0" Y1="240" X2="480" Y2="240"/>
<Line Style="{StaticResource AxisLineStyle}" X1="240" Y1="0" X2="240" Y2="480"/>
</Canvas>
</StackPanel>
</UserControl>


The App class implements the entry point of the program:


require "Silverlight"
require 'screen_point'
require 'element_dragging_tracker'
require 'plane_to_screen_converter'
require 'neville_calculator'
require 'function_plotter'
require 'polynomial'

include System::Windows
include System::Windows::Controls
include System::Windows::Media
include System::Windows::Shapes


class App < SilverlightApplication
use_xaml

...

end

App.new


The SilverlightApplication class and the referenced Silverlight.rb file are provided as part of a template for IronRuby/Silverlight project from the Silvelight Dynamic SDK.

The initialize method of the App class looks like this:


def initialize
(0..(480/24)).each do |i|
theCanvas.Children.Add create_line(i*24,0,i*24,480,"GridLineStyle")
end
(0..(480/24)).each do |i|
theCanvas.Children.Add create_line(0,i*24,480,i*24,"GridLineStyle")
end

@points = [ScreenPoint.new(100,300),
ScreenPoint.new(200,400),
ScreenPoint.new(350,300),
ScreenPoint.new(400,200)
]

@converter = PlaneToScreenConverter.new(480.0,0.0,0.0,480.0,20.0,-20.0,20.0,-20.0)

@tracker = ElementDraggingTracker.new

canvas = theCanvas

@points.each do |p|
c = create_circle p.x,p.y,10,"ControlPointStyle"
t = create_text_block "","PointTextStyle"
adjust_point_text_block(p,t)

c.mouse_left_button_down do |sender,args|
@tracker.handle_mouse_down(sender,args)
end
c.mouse_left_button_up do |sender,args|
@tracker.handle_mouse_up(sender,args)
p.x = sender.Data.Center.X
p.y = sender.Data.Center.Y
adjust_point_text_block(p,t)
replot
end
c.mouse_move do |sender,args|
@tracker.handle_mouse_move(sender,args)
if @tracker.is_captured
p.x = sender.Data.Center.X
p.y = sender.Data.Center.Y
adjust_point_text_block(p,t)

replot
end
end
canvas.Children.Add c
canvas.Children.Add t
end

replot
end


Two important things happen in this method. First the grid lines are added to the canvas and then the control points are added to the canvas and the dragging event handlers are also associated with each point. The event handlers also take care of synchronizing the update of each point's label and to recalculate and re-plot the polynomial.

The replot method executes the Neville's algorithm and create the new points for the Polyline.


def replot
@calc = NevilleCalculator.new(@converter)

@plotter = FunctionPlotter.new(@converter,200,@calc.create_polynomial(@points))

@plotter.recalculate_points

pc = PointCollection.new
@plotter.points.each do |aP|
pc.Add(Point.new(@converter.convert_to_screen_x(aP[0]),
@converter.convert_to_screen_y(aP[1])))
end

polynomialPolyline.Points = pc
create_polynomial_text_elements @plotter.polynomial
end


Additional methods for creating Silverlight shapes were required:


def create_line(x1,y1,x2,y2,style_key)
p = Path.new
p.Data = LineGeometry.new
p.Data.StartPoint = Point.new x1,y1
p.Data.EndPoint = Point.new x2,y2
p.Style = ucontrol.Resources.Item(style_key.ToString())
return p
end

def create_circle(x1,y1,radius,style_key)
p = Path.new
p.Data = EllipseGeometry.new
p.Data.Center = Point.new x1,y1
p.Data.RadiusX = radius
p.Data.RadiusY = radius
p.Style = ucontrol.Resources.Item(style_key.ToString())
return p
end

def create_text_block(text,style_key)
t = TextBlock.new
t.Text = text
t.Style = ucontrol.Resources.Item(style_key.ToString())
return t
end

def adjust_point_text_block(p,t)
t.Text = "("+("%.3f" % @converter.convert_to_plane_x(p.x)) +
","+("%.3f" % @converter.convert_to_plane_y(p.y)) + ")"
Canvas.SetTop(t,p.y+5)
Canvas.SetLeft(t,p.x-5)
end


Separating the styles

Silverlight style separationprovides a way to separate style definitions for UI elements. For this program, all the style definitions are defined in a separate section of the XAML file.


<UserControl.Resources>
<Style TargetType="TextBlock" x:Key="FormulaTextStyle">
<Setter Property="FontSize" Value="13"/>
</Style>
<Style TargetType="TextBlock" x:Key="FormulaExponentTextStyle">
<Setter Property="FontSize" Value="12"/>
</Style>
<Style TargetType="TextBlock" x:Key="PointTextStyle">
<Setter Property="FontSize" Value="10"/>
</Style>
<Style TargetType="Line" x:Key="AxisLineStyle">
<Setter Property="Stroke" Value="Black" />
<Setter Property="StrokeThickness" Value="3" />
</Style>
<Style TargetType="Polyline" x:Key="PolylineStyle">
<Setter Property="Stroke" Value="Black" />
</Style>
<Style TargetType="Path" x:Key="GridLineStyle">
<Setter Property="Stroke" Value="Cyan" />
</Style>
<Style TargetType="Path" x:Key="ControlPointStyle">
<Setter Property="Fill" Value="Blue" />
</Style>
</UserControl.Resources>


In order to assign styles to elements in IronRuby the following code was used:


p.Style = ucontrol.Resources.Item(style_key.ToString())


Given that style_key is an IronRuby variable with a string. Note that I had to use the ToString method. If the ToString method as not used I received a runtime error saying: ArgumentException: key must be a string.

Deploying the application

The creation of the XAP file to be deployed is VERY simple. The following command creates an app.xap file from a existing app folder.

Chiron.exe /z:app.xap /d:app


The /z parameter adds all the libraries required for executing IronRuby.

Final words

The only issue I see is the lack of documentation for using Silverlight features with scripting languages. The main thing missing is how to use data binding (if possible) which is a very nice feature which I enjoyed using in JavaFX Script for the previous post.

Because of the inclusion of the IronRuby support libraries, the final XAP size was be bigger than I expected (~700K in this case). However it was not as big as the one from the JavaFX example which included all the JavaFX runtime libraries.

For this example I had to take care of the performance. I stared using an almost direct port of the JavaFX script code of the previous post for the algorithm and the polynomial operations which lead to bad performance.

The integration of IronRuby with .NET is very nice, translating examples from C# was very easy, for example with the element dragging code described above. One thing that can be improved is to give more information on where an exception occurred in a program.

Overall the experience of working with IronRuby and Silverlight was very nice. I was very easy to get feedback of code changes just by hitting refresh in the browser.

Code for this post can be found here.

The running version of the example can be found here.